Candles
10/28/23
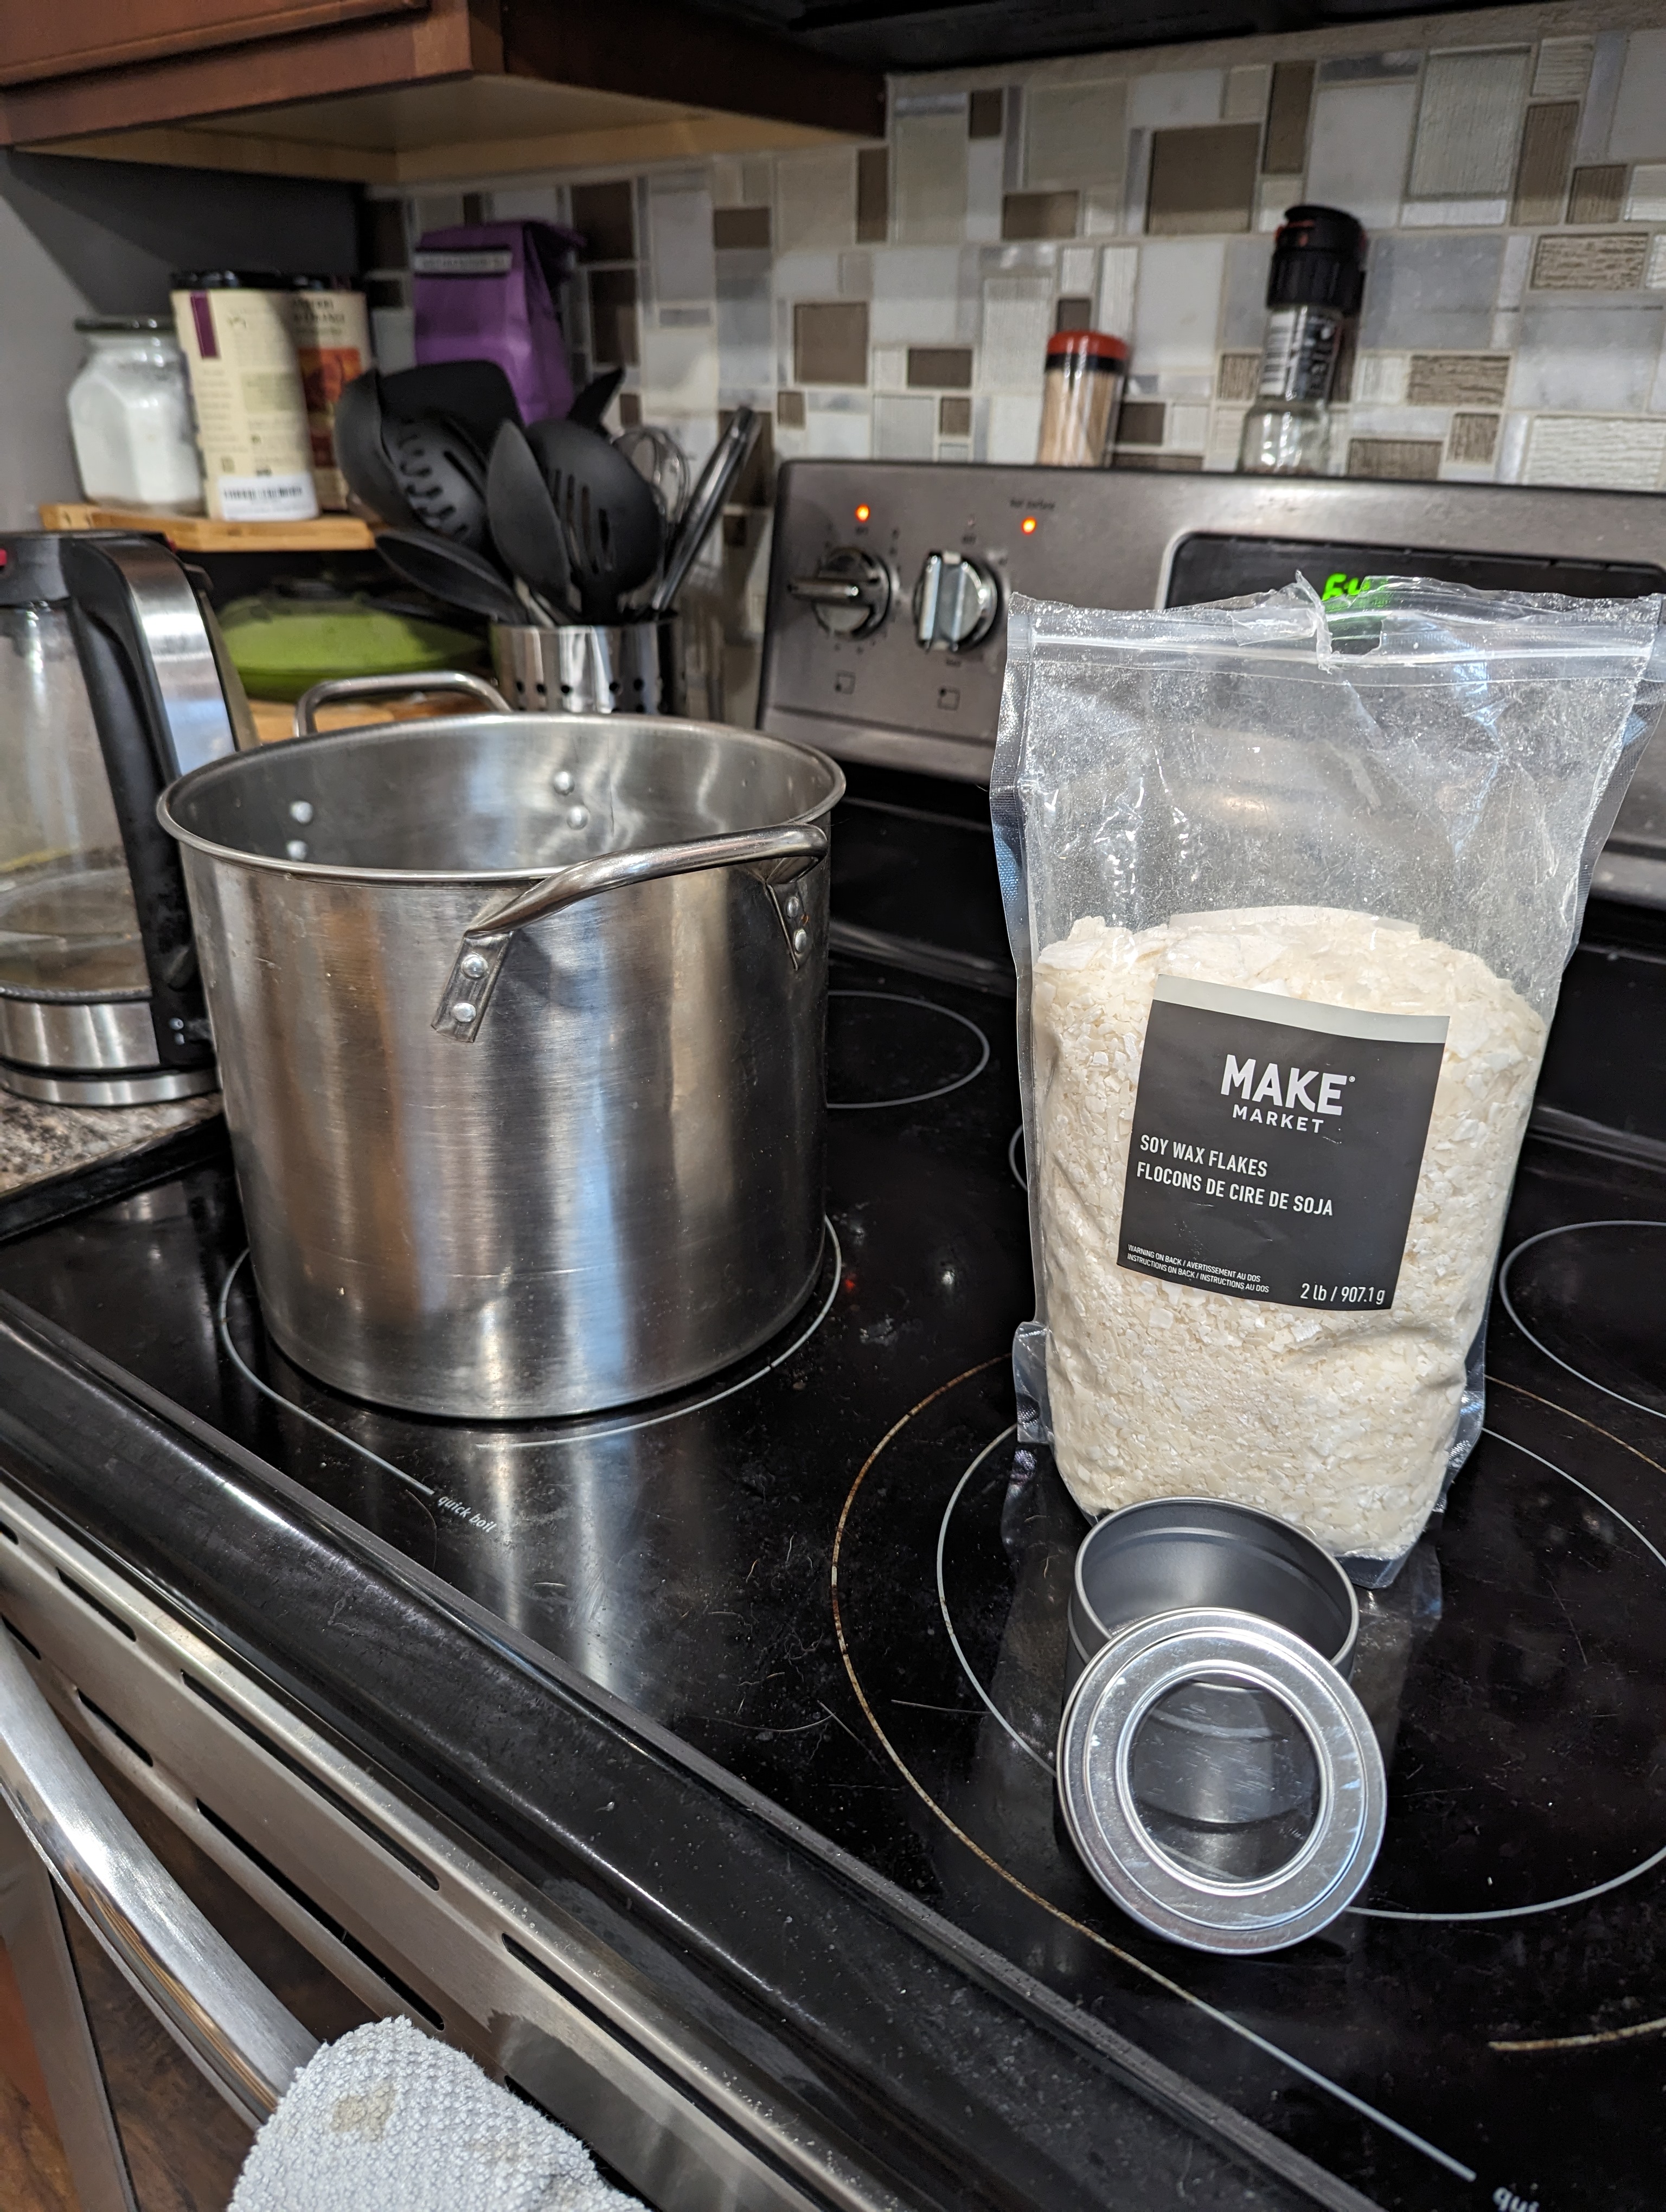
I decided I wanted to try my hand at making candles. I had thought about it before, but the more I read about it the more complicated it sounded- You have to add your fragrances while the wax is at an ideal temperature, otherwise the fragrance will burn off in the pan and the candles will not have a scent. I'm not sure if I mastered that concept or not, but we'll get to that in a minute. In the meantime, here's some of the supplies I started with. I got a 2lb bag of Make Market soy flakes ($20) and the candle tin (~$3) from Michael's. They also had a bunch of fancy gadgets to melt wax and keep it at a pre-set temperature, but they were expensive and I didn't want to invest a lot of money into a project I wasn't sure I was going to like when essentially all you need is a double boiler. Unfortunately, I didn't have a double boiler either (lol) so I improvised. Michael's had a tall canister with a black handle (pictured further down, ~$12) intended to be used to pour wax, but I figured that would be fine to stick in a pot of boiling water and so far I haven't burned my house down, so I guess I was right. The black handle is plastic, but you can use the weight of the wax to tip the container so the handle doesn't touch the other pot while it's boiling. Or just get a double boiler, whatever haha. The point is that you don't want the wax exposed to direct heat or it will burn, so you have to have that layer of separation, regardless of which method you choose to achieve it.
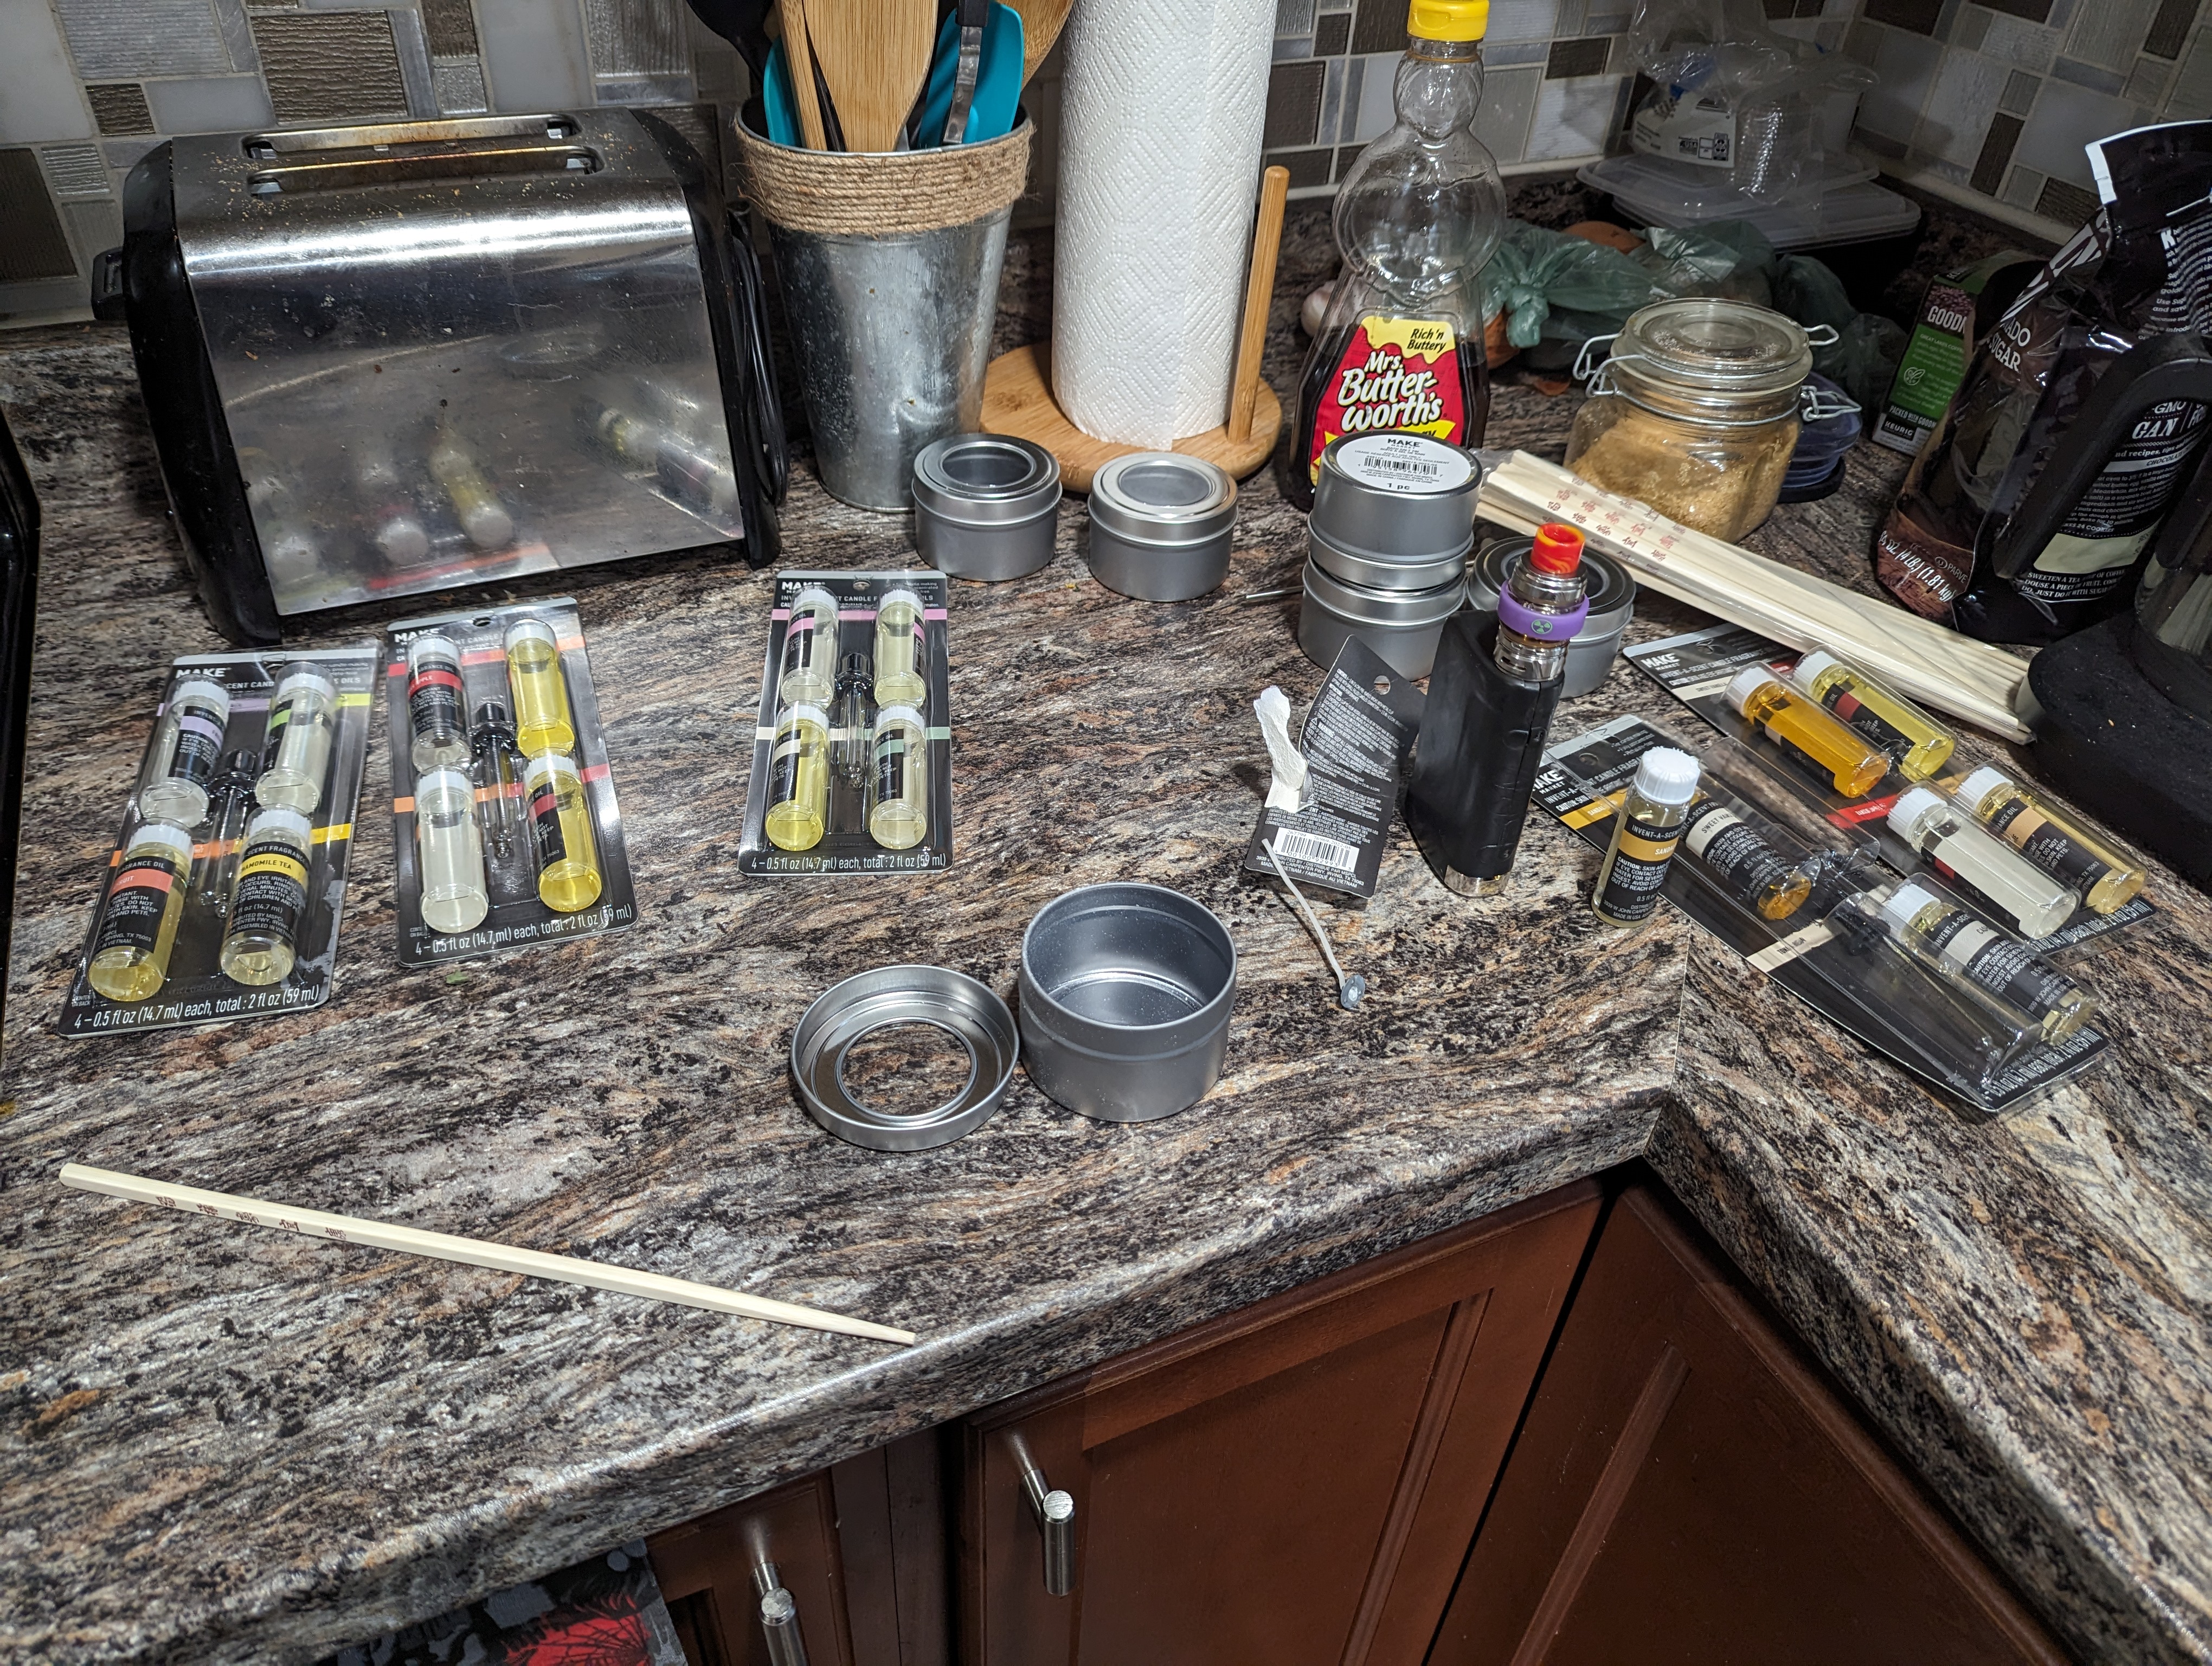
Behold, my messy counter! Pictured here are some more supplies I picked up at Michael's. Each 4pk of fragrance oil was $13, but I am indecisive so I grabbed a bunch. You don't need that many to start, especially if you already have an idea of the scent you want to make. You can also see I picked up some extra tins, and I grabbed a pack of wooden chopsticks from Walmart (I think they were less than $5) because I needed something long and disposable to stir the wax with and my brain told me that this was the most logical choice. Did you come here to judge me or to learn how to make candles? That's what I thought. Not pictured here is the candy-making thermometer I also got at Walmart for $25, but I'm sure there are cheaper ones available. I was in a hurry and that was all that they had in stock. It doesn't have to be a candy-making thermometer either, just one that is long enough to reach the bottom of the wax pan without burning you, and a digital readout is a plus but not a necessity.
Here you can see the soy flakes inside the container I mentioned before. The black plastic handle is touching the other pot in this picture because I hadn't figured out to offset the weight yet. If you're wondering about measurements, the wax shrinks when you boil it, so you need to use more than you would think. I used an empty candle tin for reference, filling it to the top once, and then maybe 1-1.5in below the top a second time and that seemed to be about right. So just shy of two full empty tins to make one full candle.
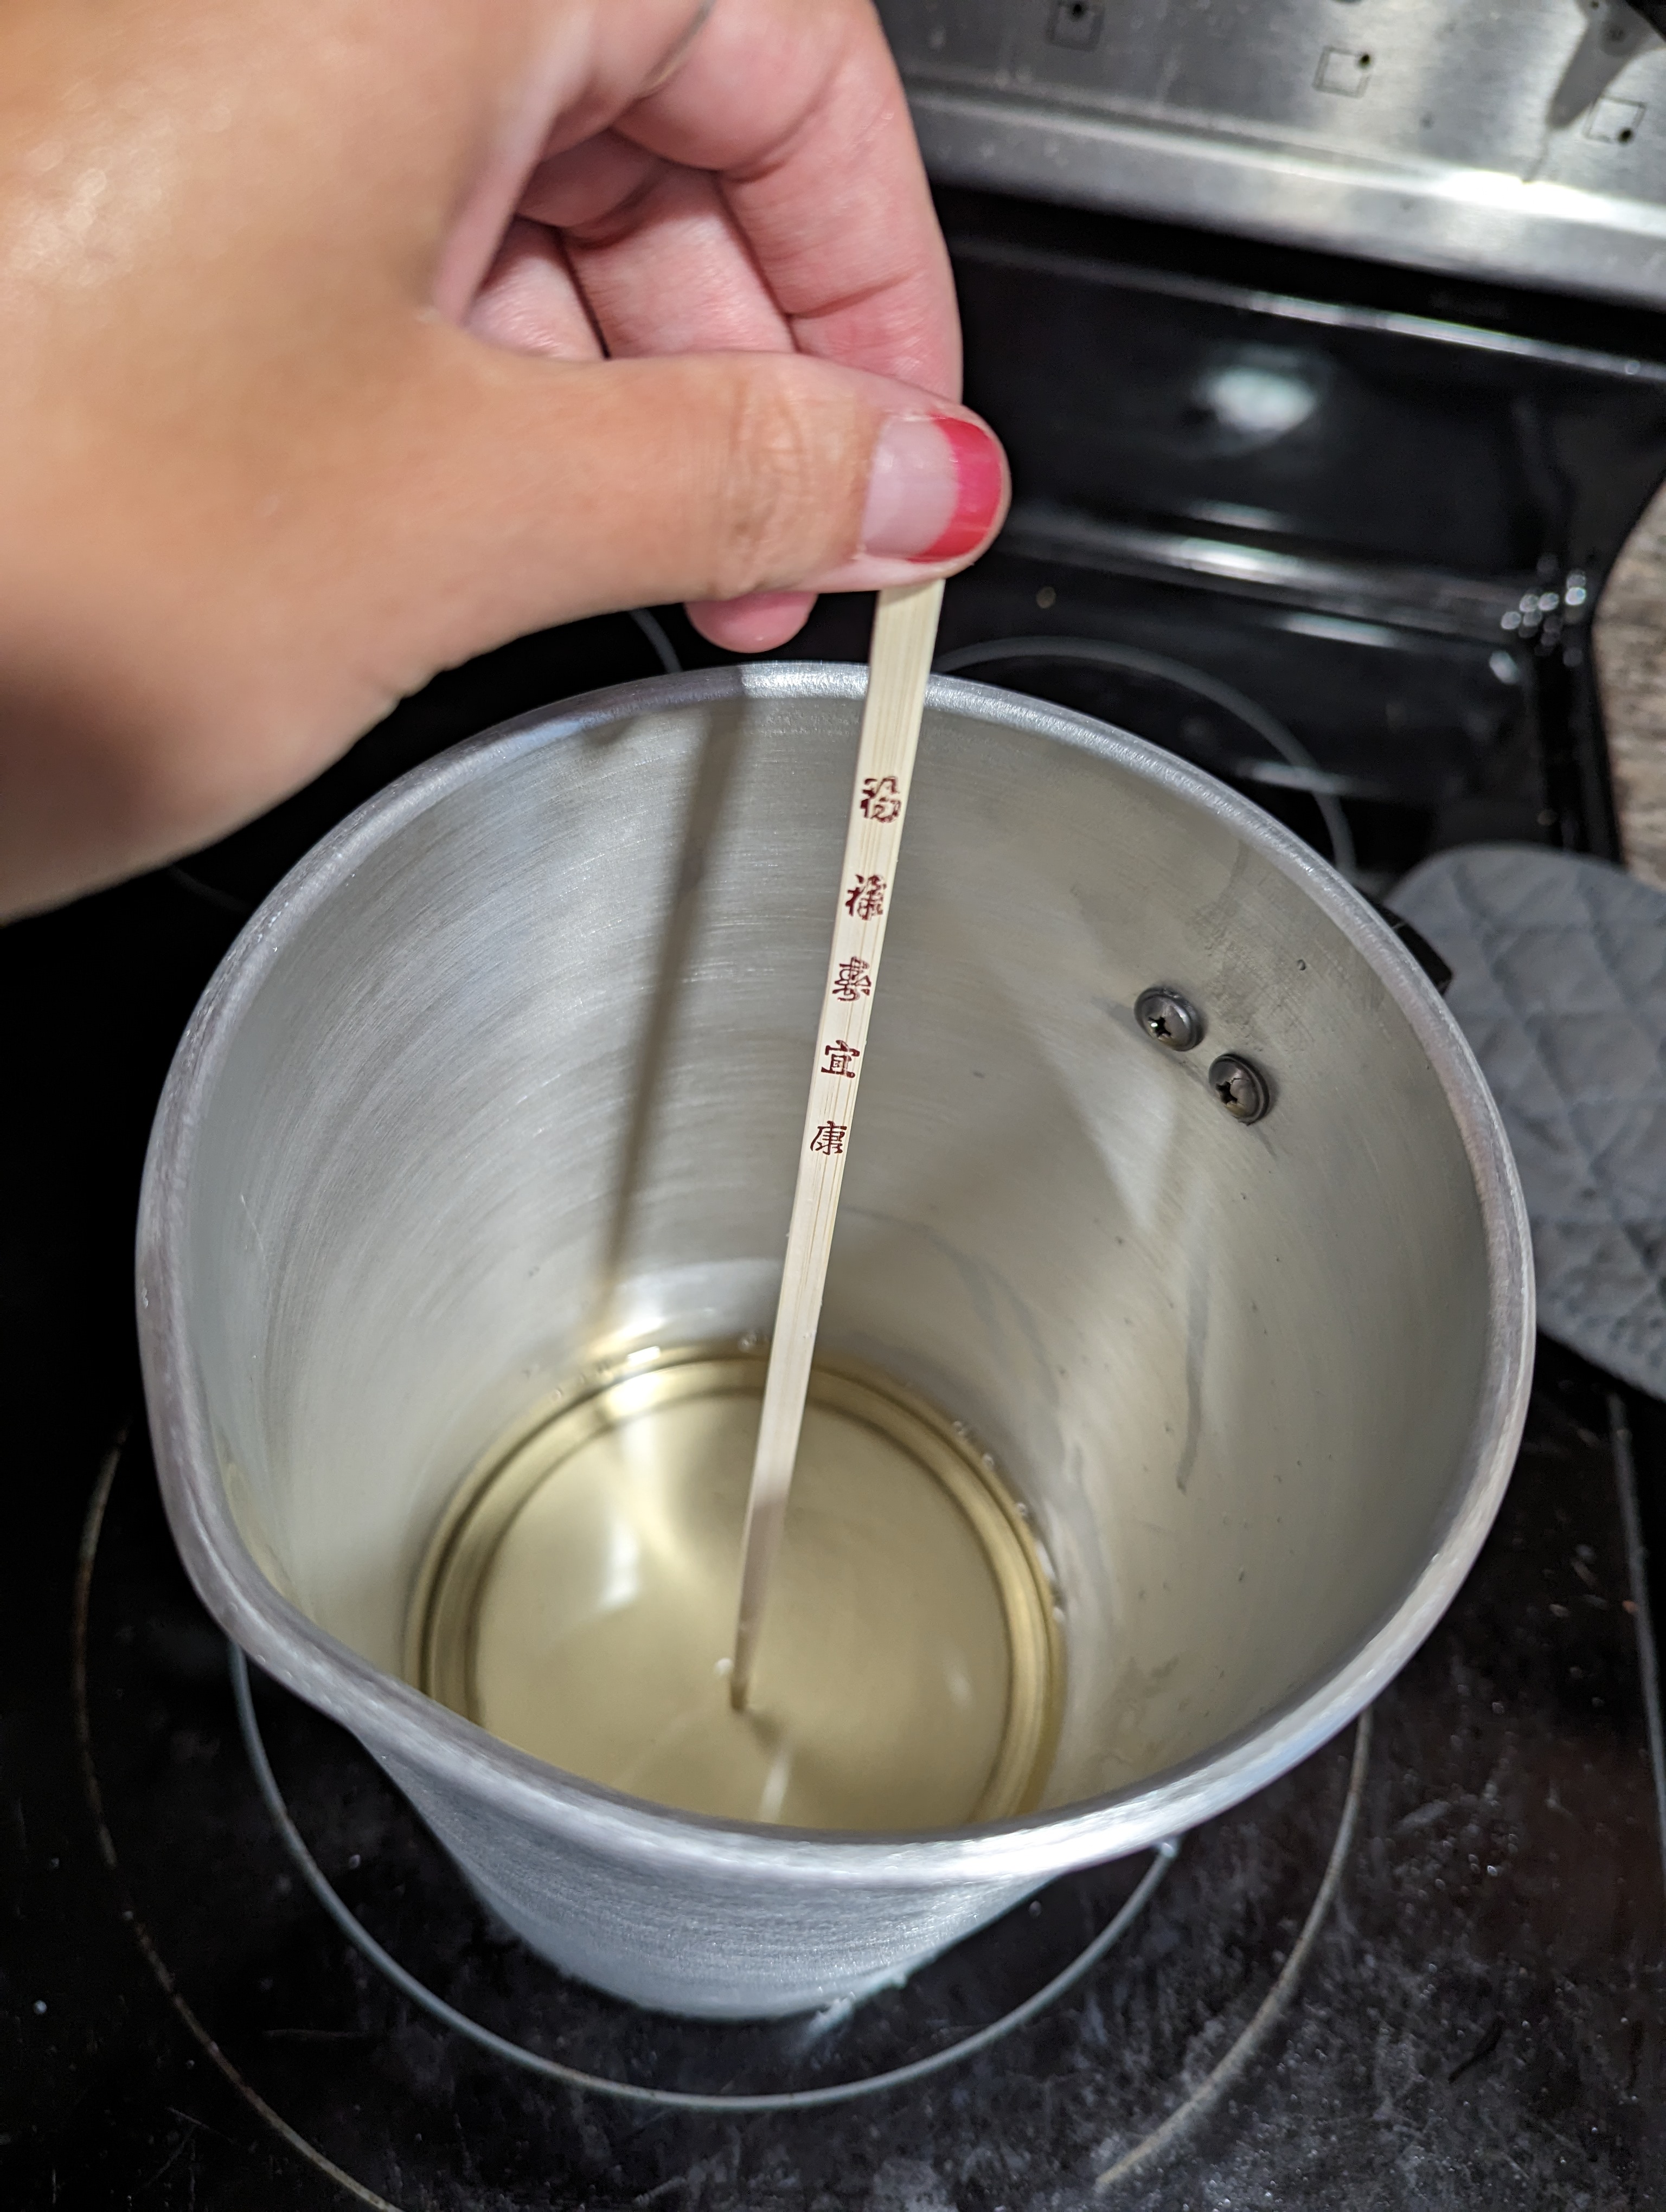
Here I am stirring the wax with a chopstick haha. While I was waiting for all the clumps of soy flakes to melt, I prepped the tins on the side (not pictured). I got some wicks from Michael's (~$3 for a small pack or $7 for a big pack) and some round double-sided stickers to secure them to the bottom of the tin. If you don't secure the wick, it will float all over the place and ruin your candle. You don't necessarily need the stickers, you can also secure the wick with a bit of glue or even a little of the wax that you are currently boiling, but I tried the wax method first and it was really annoying. The wax would dry before you placed the wick on it, and even if you managed to get the wick placed in time, when you pour the hot wax on top of it, the little bit you used to secure the wick would melt and the wick would move. I don't recommend securing it with wax, but glue would be fine if you don't mind waiting for it to dry. Michael's also sells these little metal strips that sit on top of your candle and hold the wick upright while you pour- I didn't have them when I did this first batch, but I got them later and they are very helpful.
After the wax has melted and your tins are prepped, you're going to want to use that thermometer to check the temperature of the wax. I'm still a candle newbie and don't want to give anyone bad advice, but from what I've read so far it sounds like a good temperature to add the fragrance oil is around 180F. You should absolutely do your own research on this part because my results have been hit-or-miss and I don't want you to ruin your project! As for measuring the fragrance, again, do your own research in case I am wrong, but from what I read you would want to use .5oz (one full bottle of the fragrances pictured above) for 1lb of wax (that is a 2lb bag in my picture). If you're wondering how much to use for one small 4oz candle, unfortunately the answer is math. Trust me, I hate it as much as you do. I determined that 5ml of fragrance is a good starting point for a 4oz candle, but you might want to use a bit more. If you are using multiple fragrances, you can break that 5ml up anyway you want to get the scent you are looking for- For instance, the Apple Pie candle I made uses 1ml of Baked Apple fragrance, 2ml of McIntosh, 1.5ml of Cinnamon, and .5ml of Vanilla for a total of 5ml (all of those fragrances came in the packs from Michael's shown above).
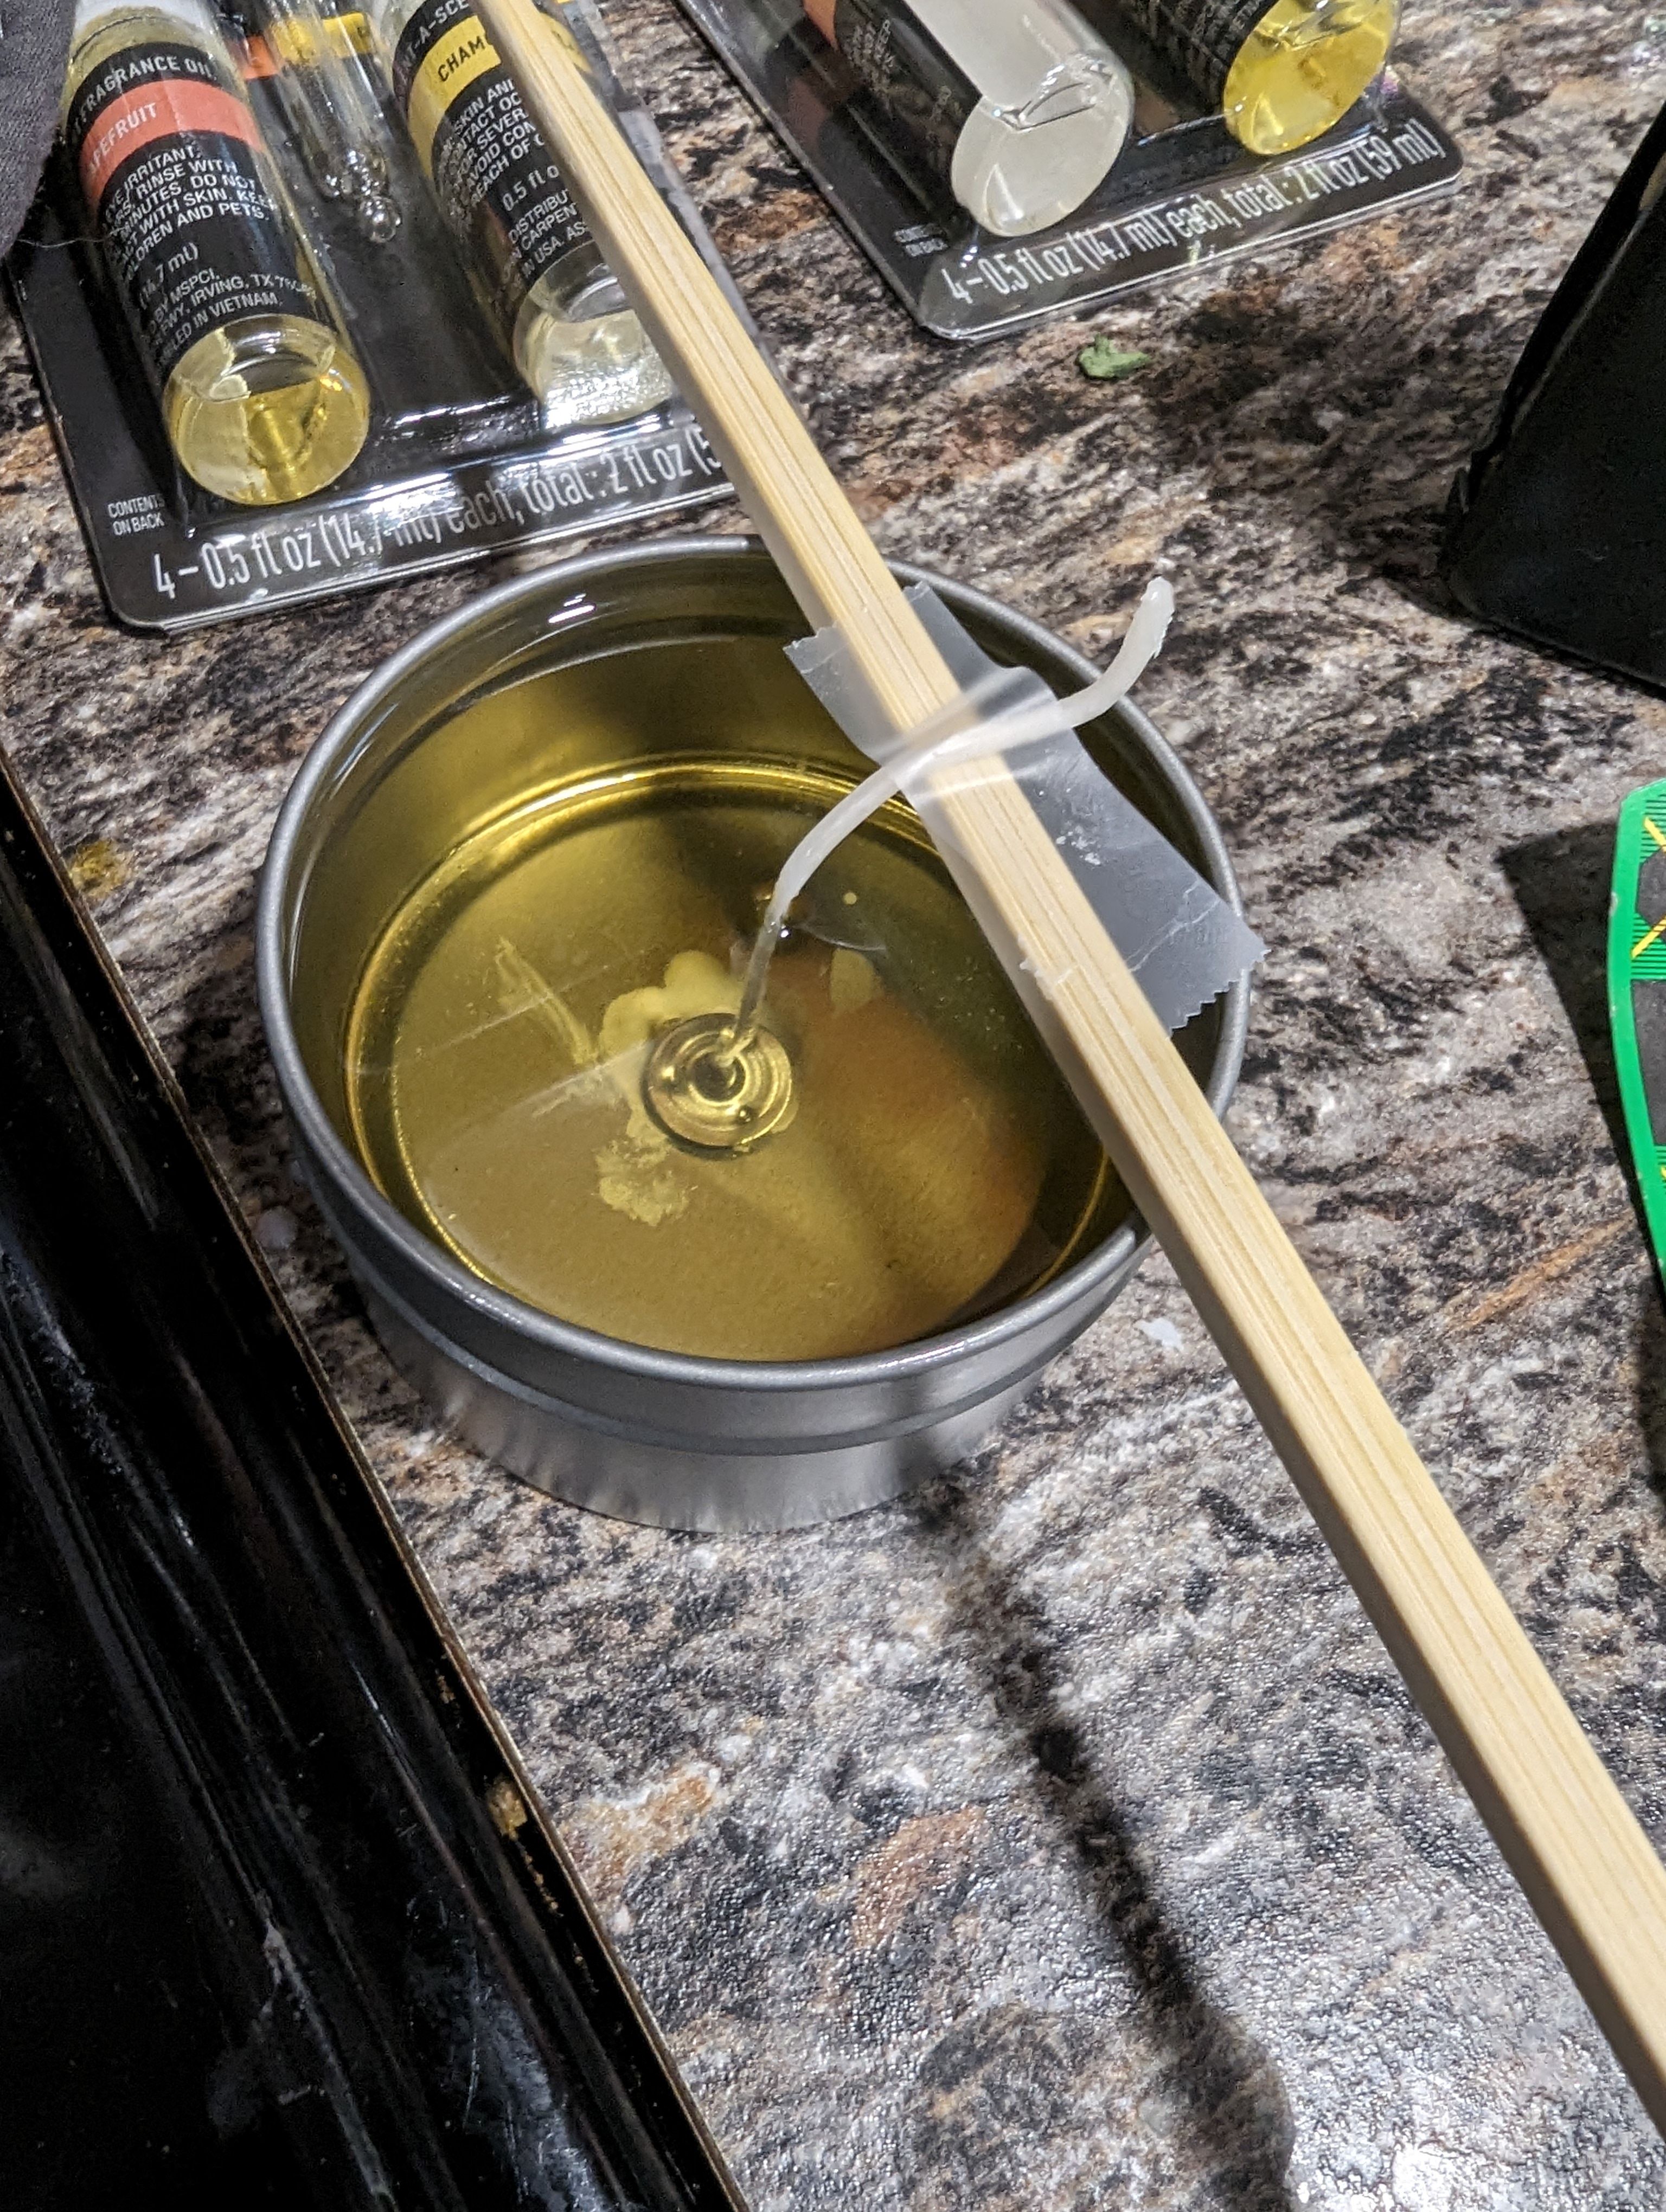
The candle has been poured! You can see where I had tried to use wax to anchor the wick to the base of the tin, and I didn't have the metal strips to keep the wick upright yet, so I leaned on my handy dandy chop sticks once more. They're actually a lot more helpful than I had originally expected! Now we just have to wait for them to dry.
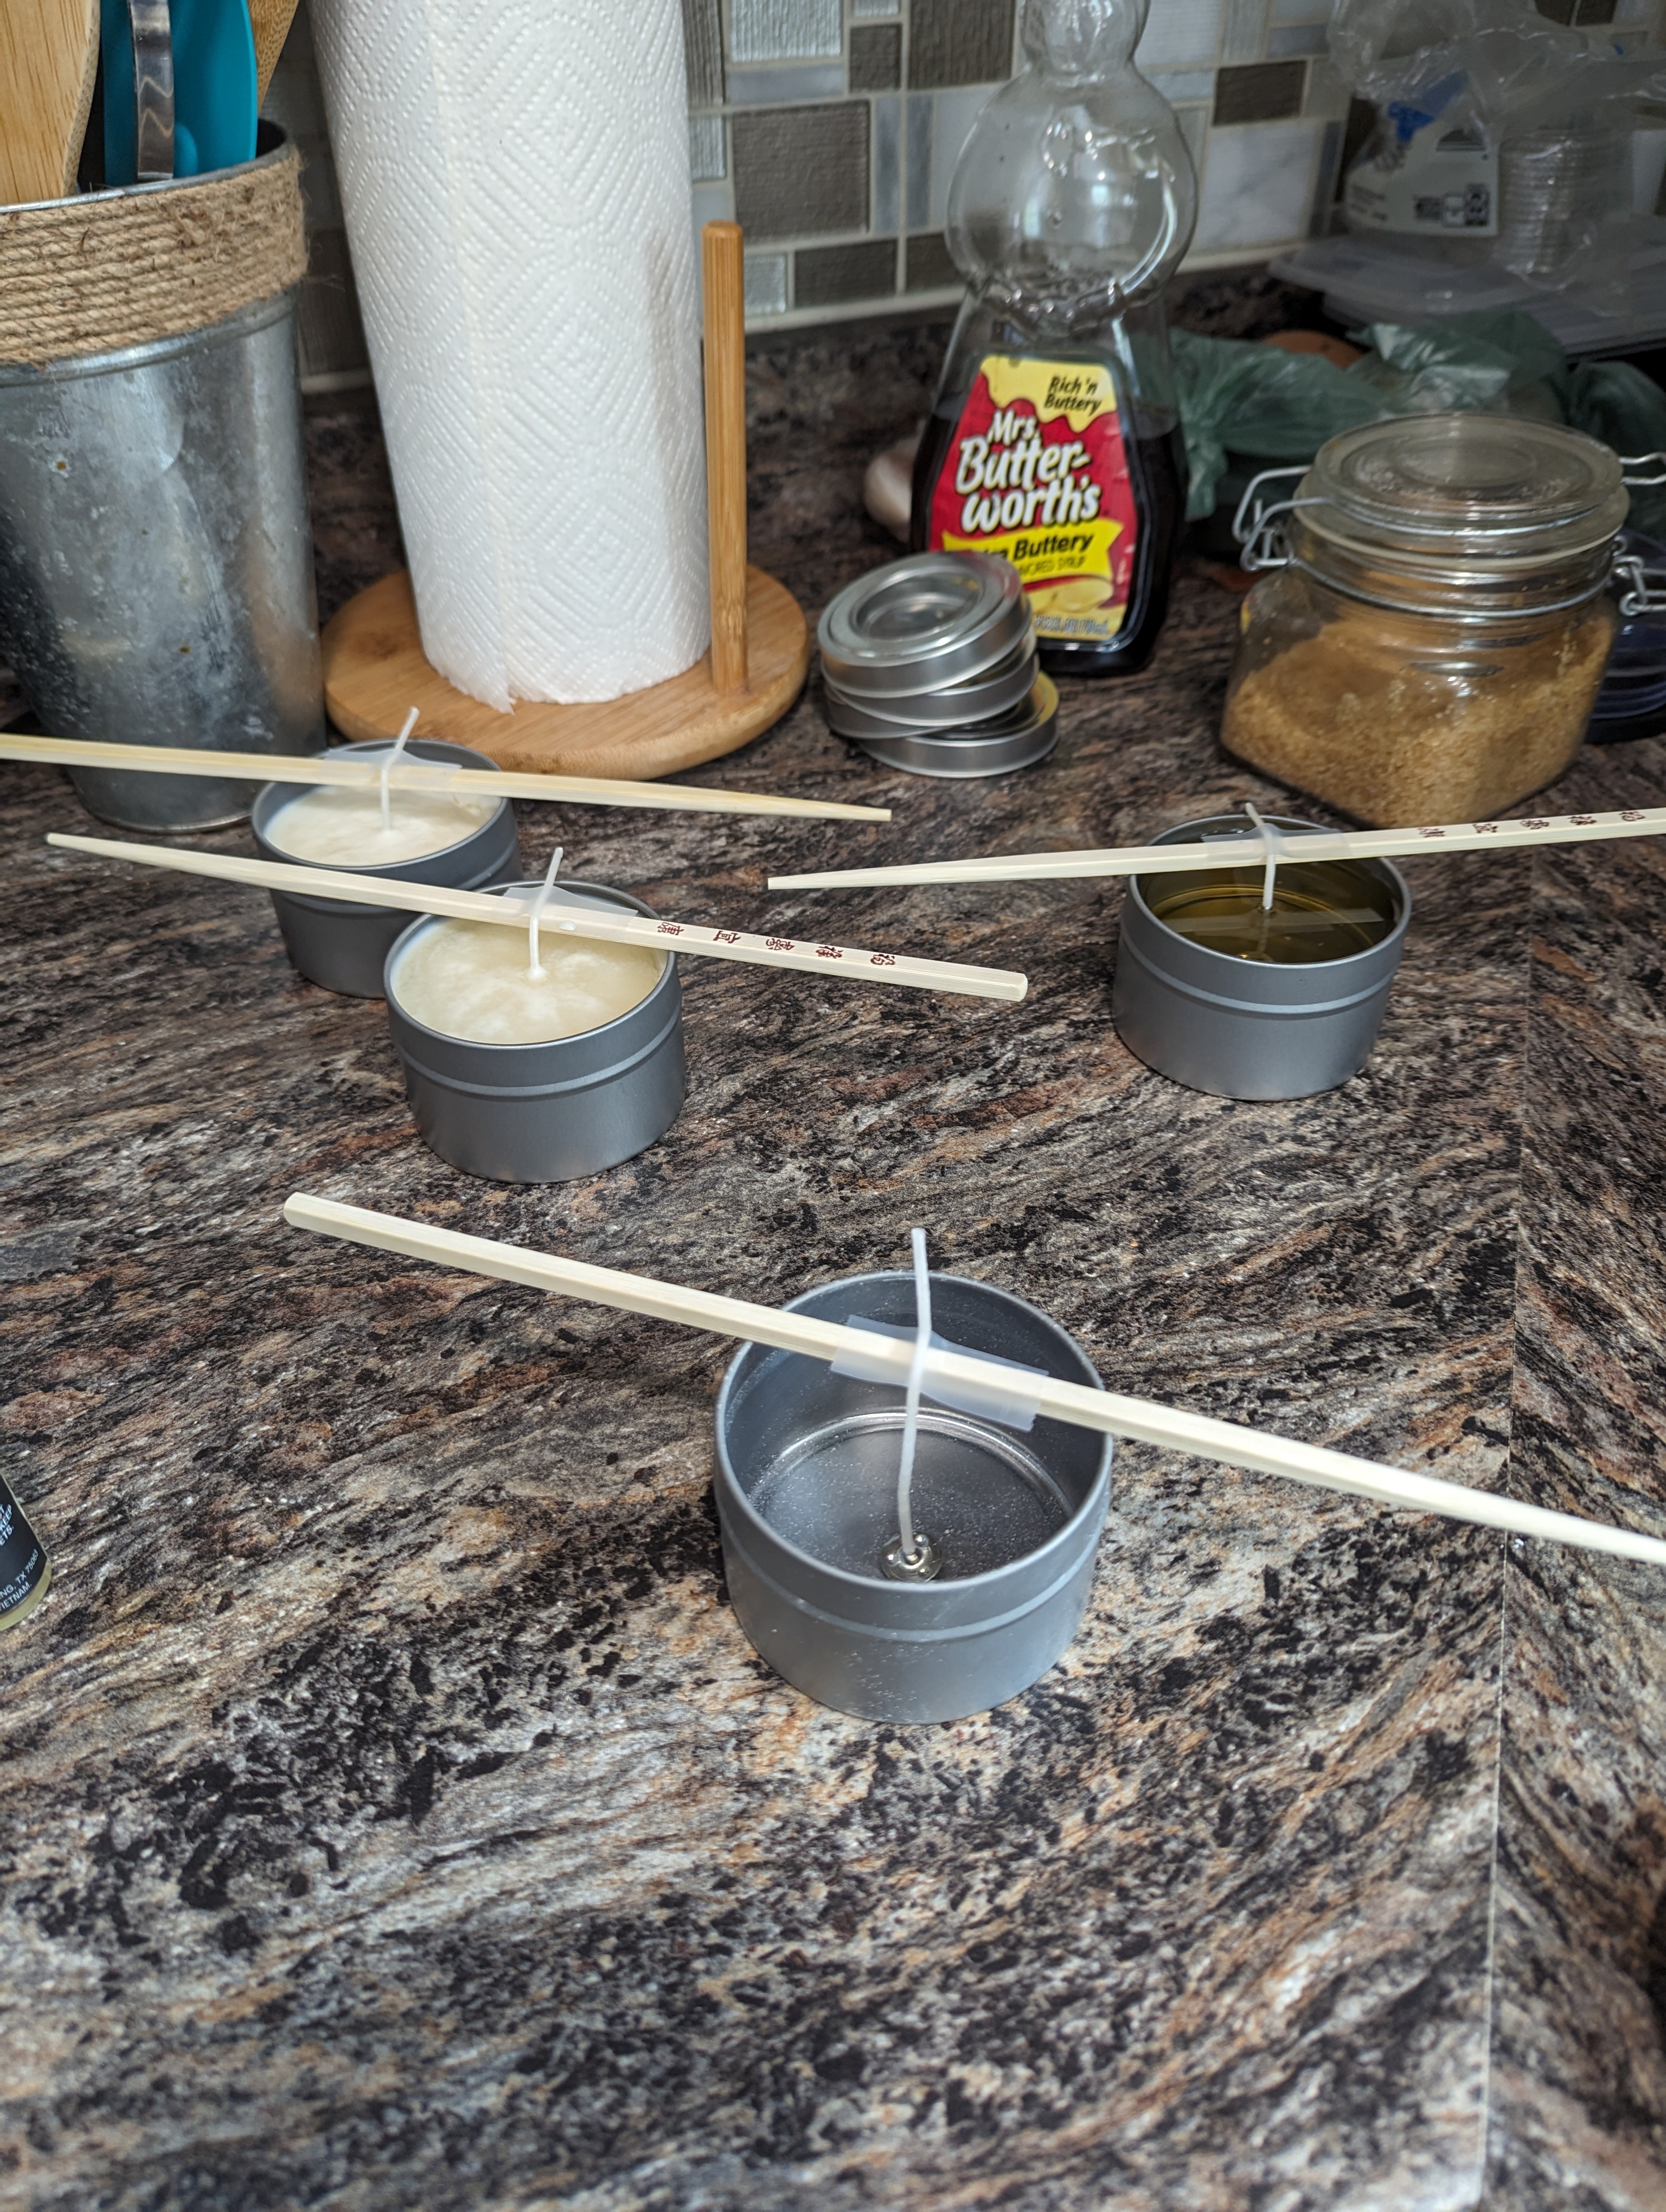
...Except I have an issue with patience, so rather than waiting for my first candle to dry I used that time to make a few more. You can see that two of them are almost dry in the background, and in the front I have an empty tin that is prepped and waiting to be poured. If I remember correctly, there were two slightly different versions of the Apple Pie candle here, and the other two were Lemon Sage.
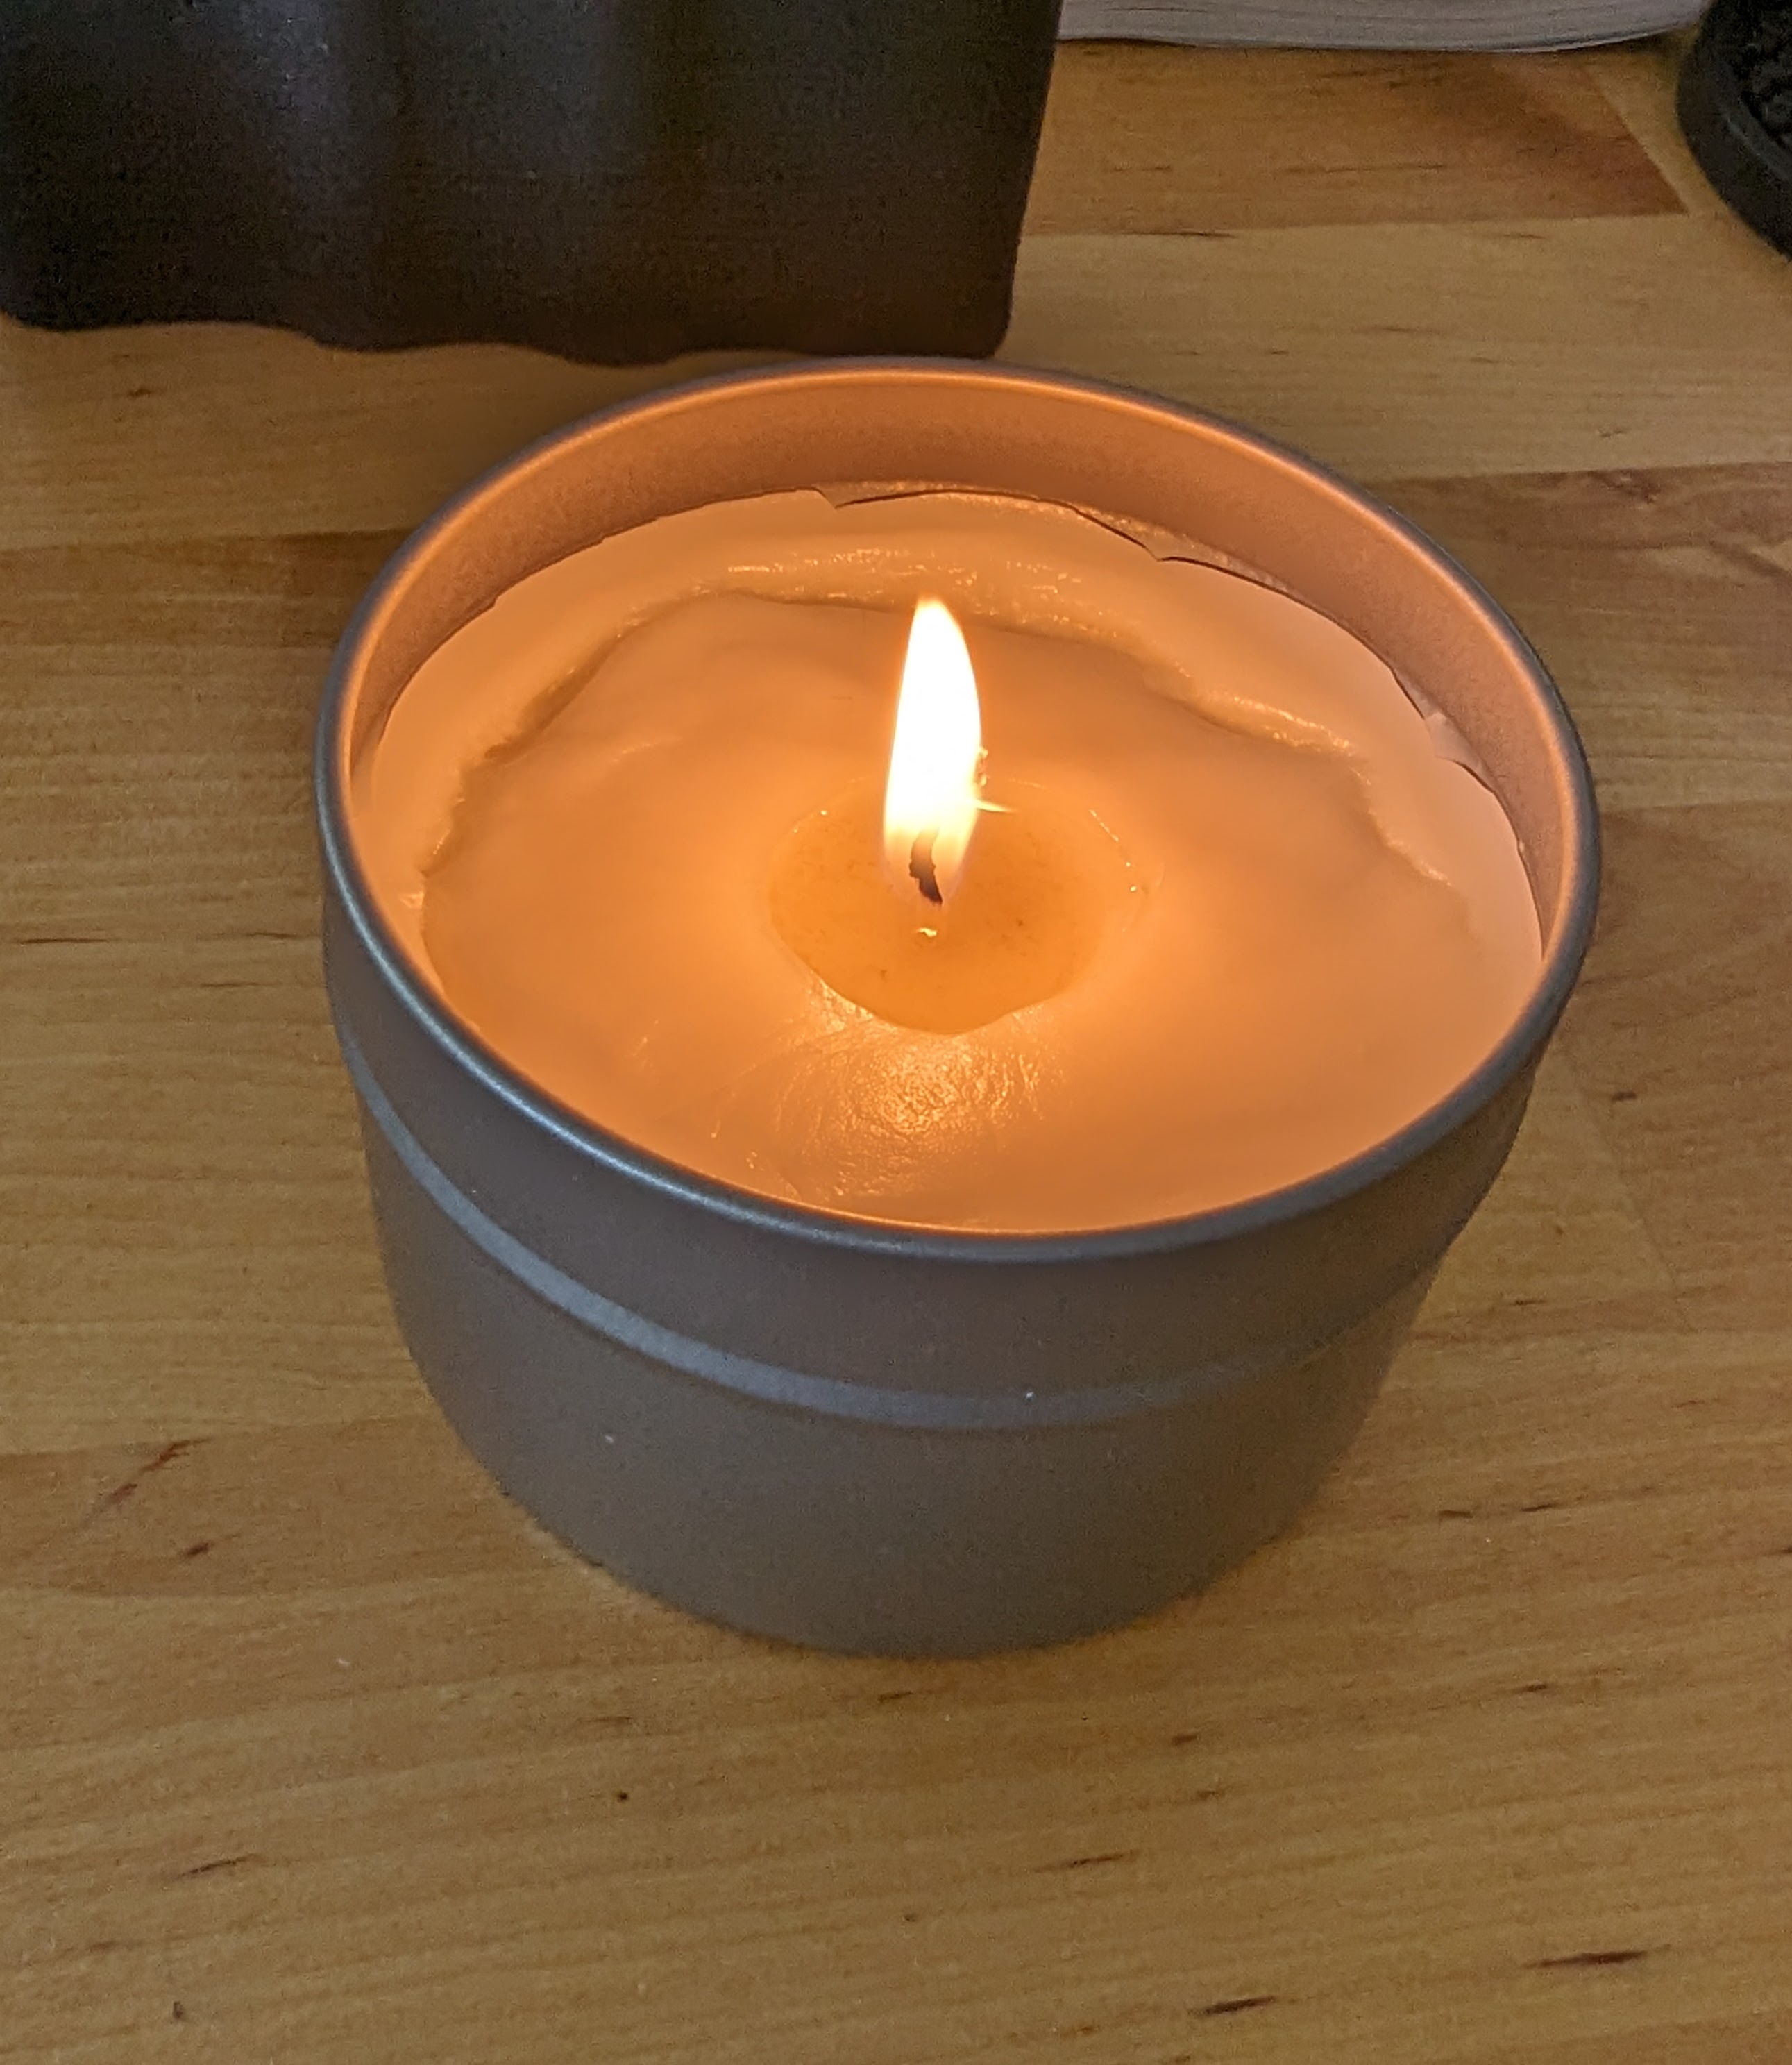
Hooray! The candle making process is complete! As I mentioned before I'm still quite new to candle making, but I was pretty impressed with the way most of them smelled inside the containers. I did notice that the scent isn't very strong when they are burning though, which is why I said you may want to do some more research and/or increase the amount of fragrance you use. I have a terrible sense of smell anyway, and others have said they can smell them after they have been lit, but I'm still leery. We are our own worst critics, after all!
Babypede
9/15/23
I realize that the Babypede falls under the category of 'horror babies', but I made this one after the rest and the process was a bit different so he's getting his own entry. We start again with the same plain baby doll from the Dollar Tree that I used to make the others. If you recall (or care), I had purchased a case of them from the Dollar Tree website because they were sold out when I needed them. The downside to this is that the dolls were mix and match in the case, so as you can see, this one has a pink torso whereas the ones I used for Pinhead and Reagan had white torsos. Not a huge deal, but obviously the pink is more difficult to cover than white, so choose your project accordingly. I knew I would be painting this one solid black at some point, so I went with the pink torso for this project to leave myself with more white torso dolls for future projects that might be painted a lighter color.
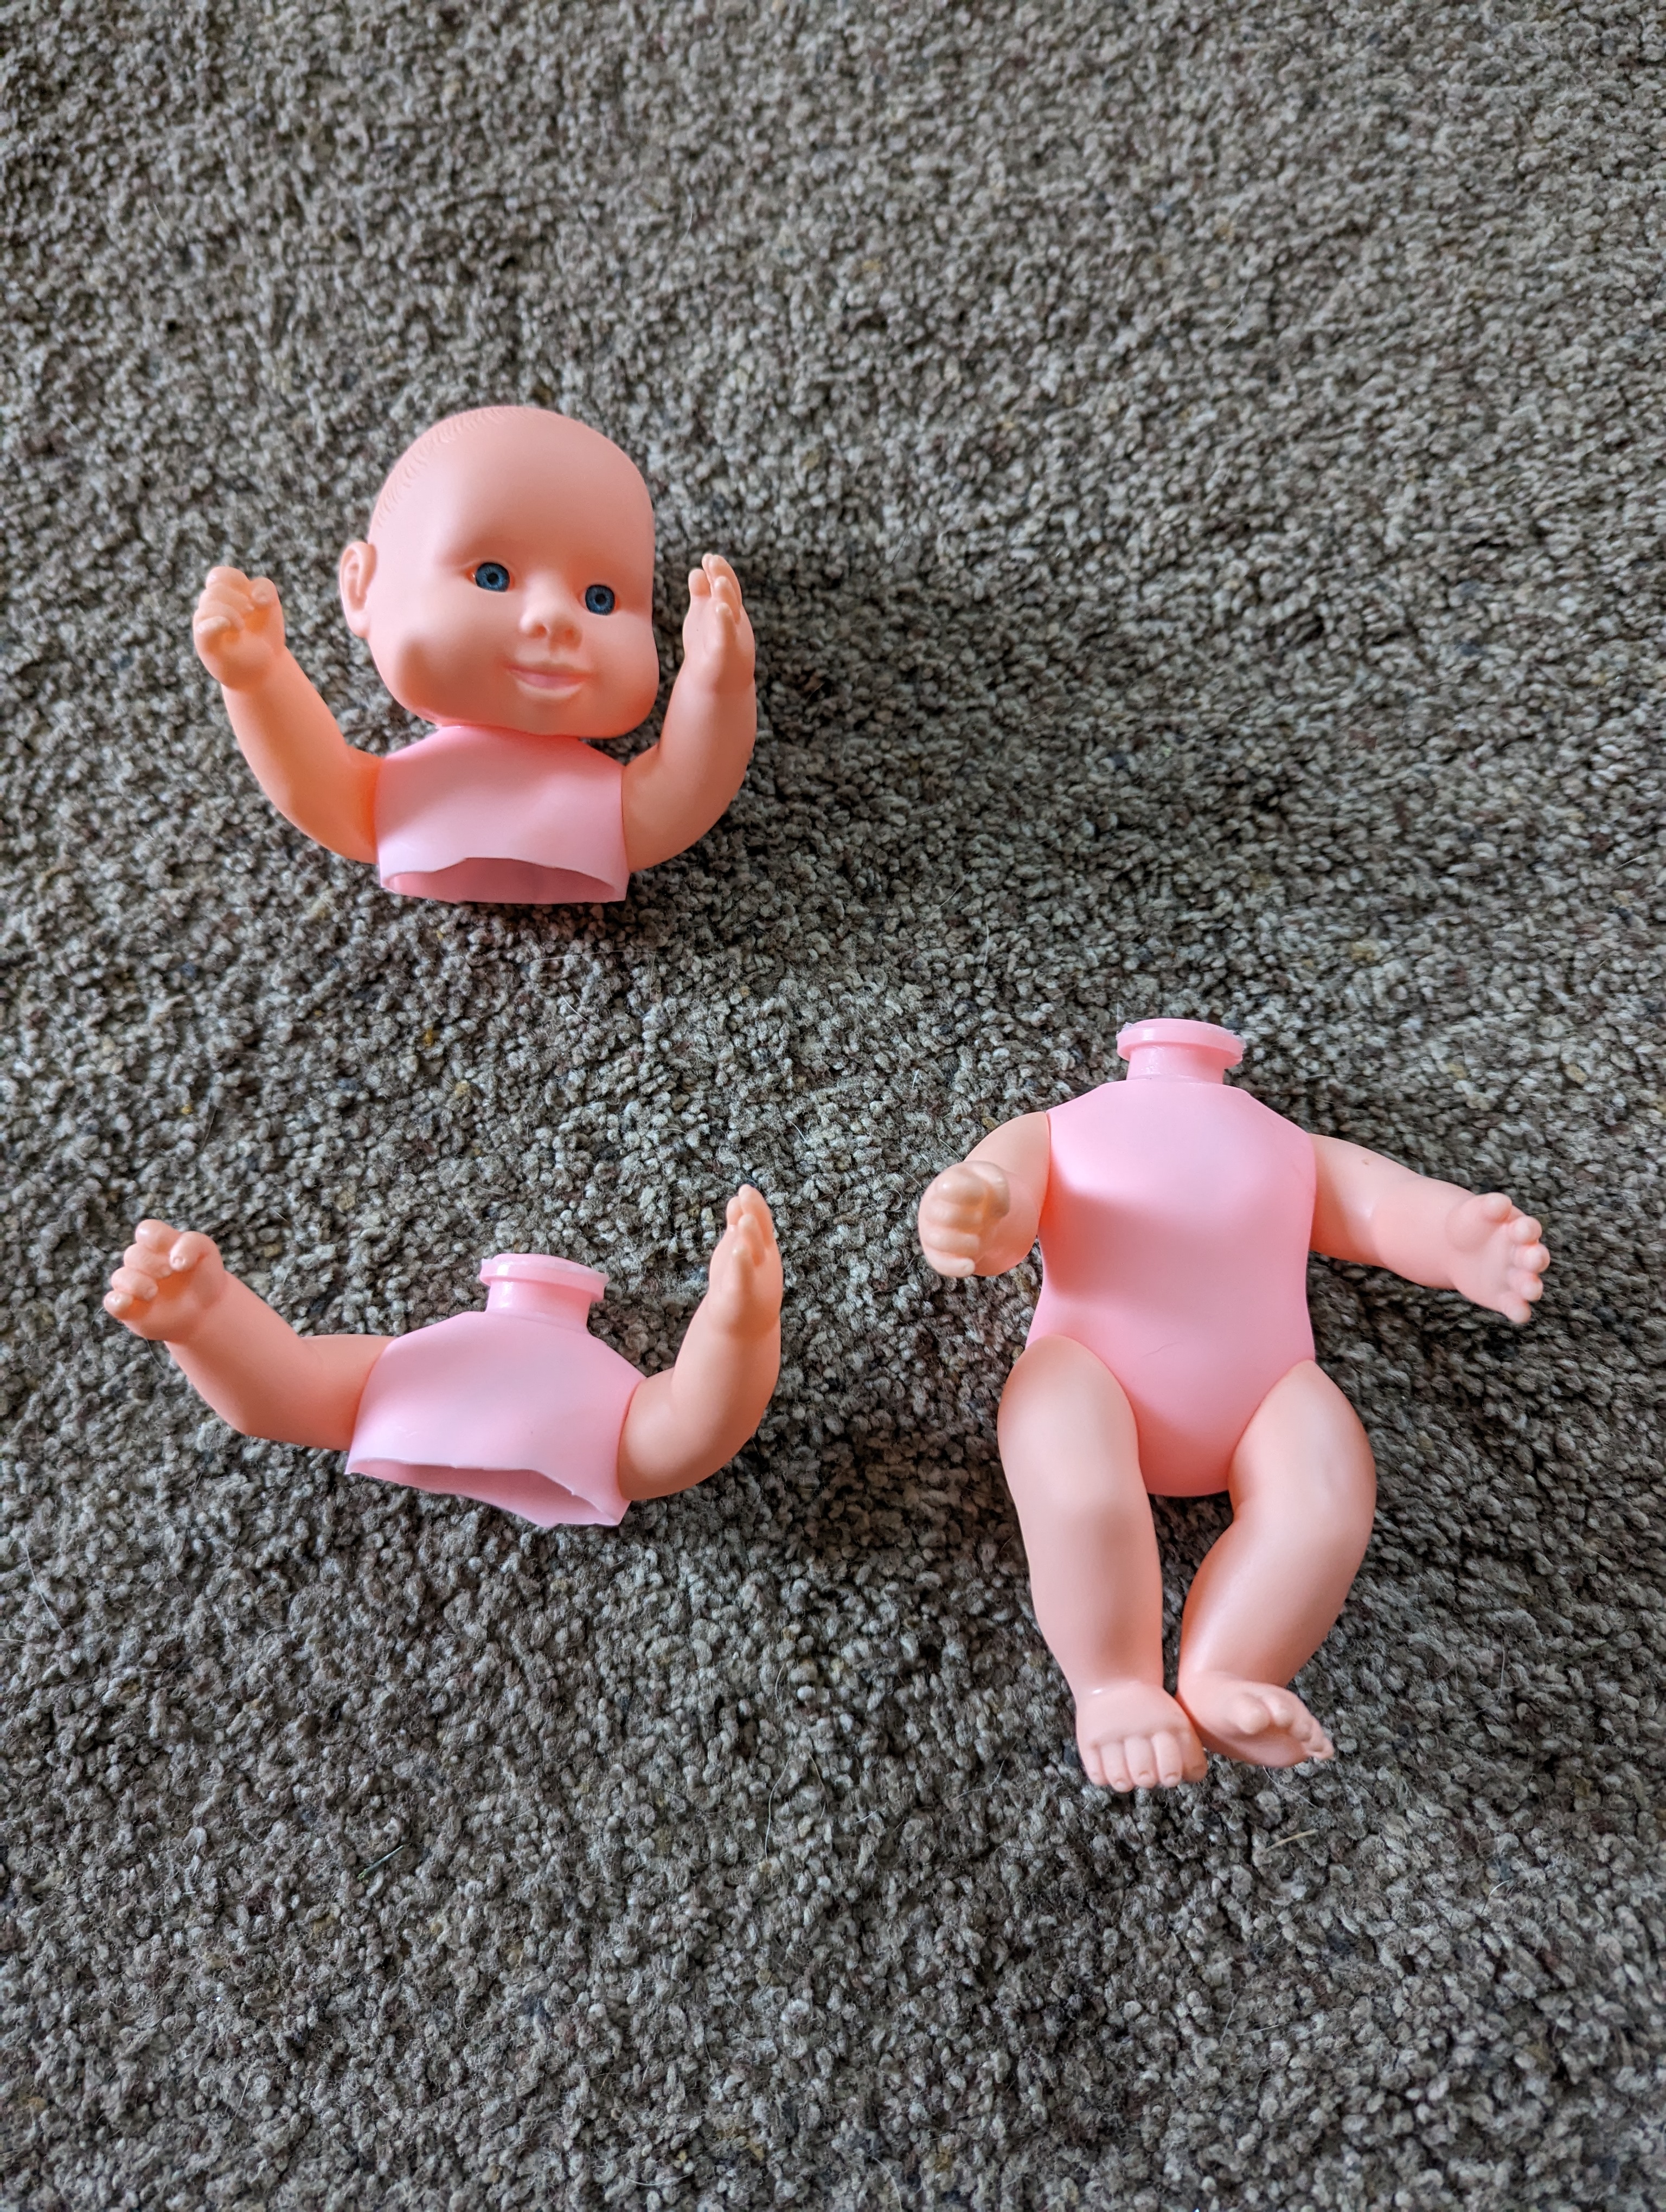
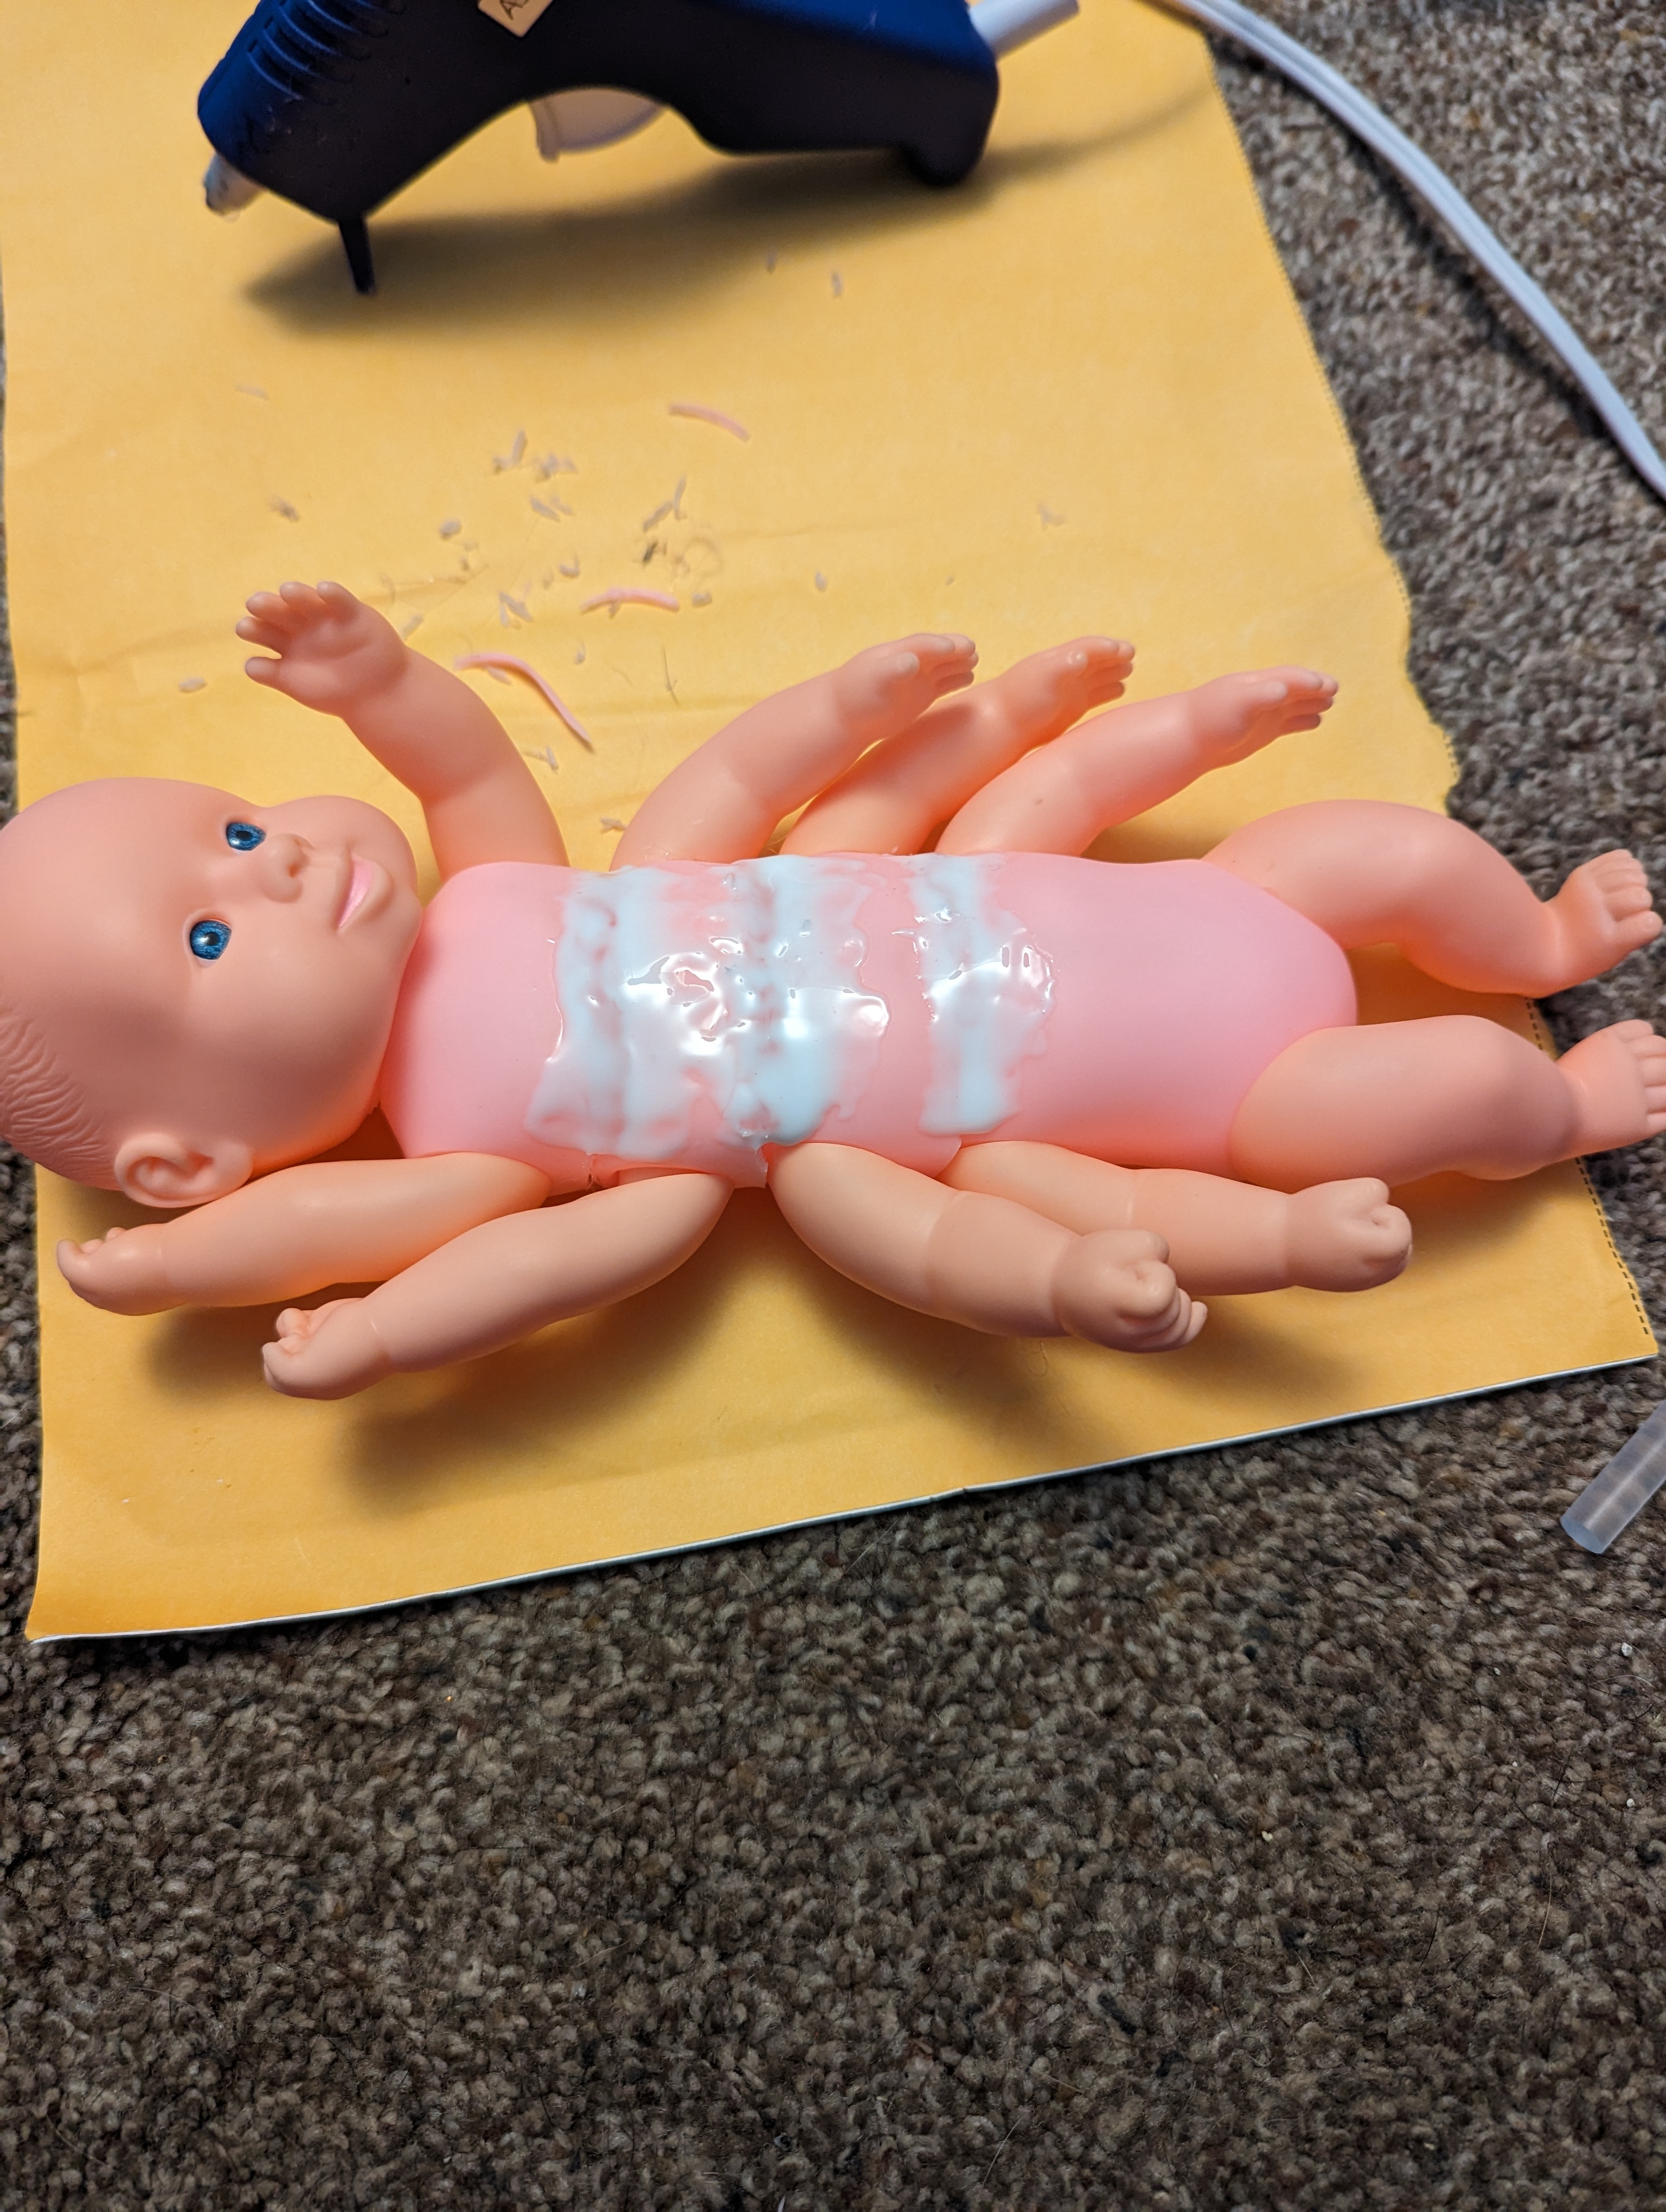
Now the fun part! I decided how many 'segments' I wanted my babypede to have, and using a box cutter I began the Infant Disassembly Process (IDP for short). I took the head off of one to use as the base leaving the arms and legs attached, and cut another one in half just below the armpits to use as the top with the head intact. I then cut two more in half below the armpits and removed the heads to use as the middle segments. I left the weird looking nipple thing that holds the head on in place for all of my segments because at the time I thought it would give me a larger surface to attach the pieces to, but come to find out it doesn't even touch the sides so you can cut it off if you want to. It doesn't matter either way.
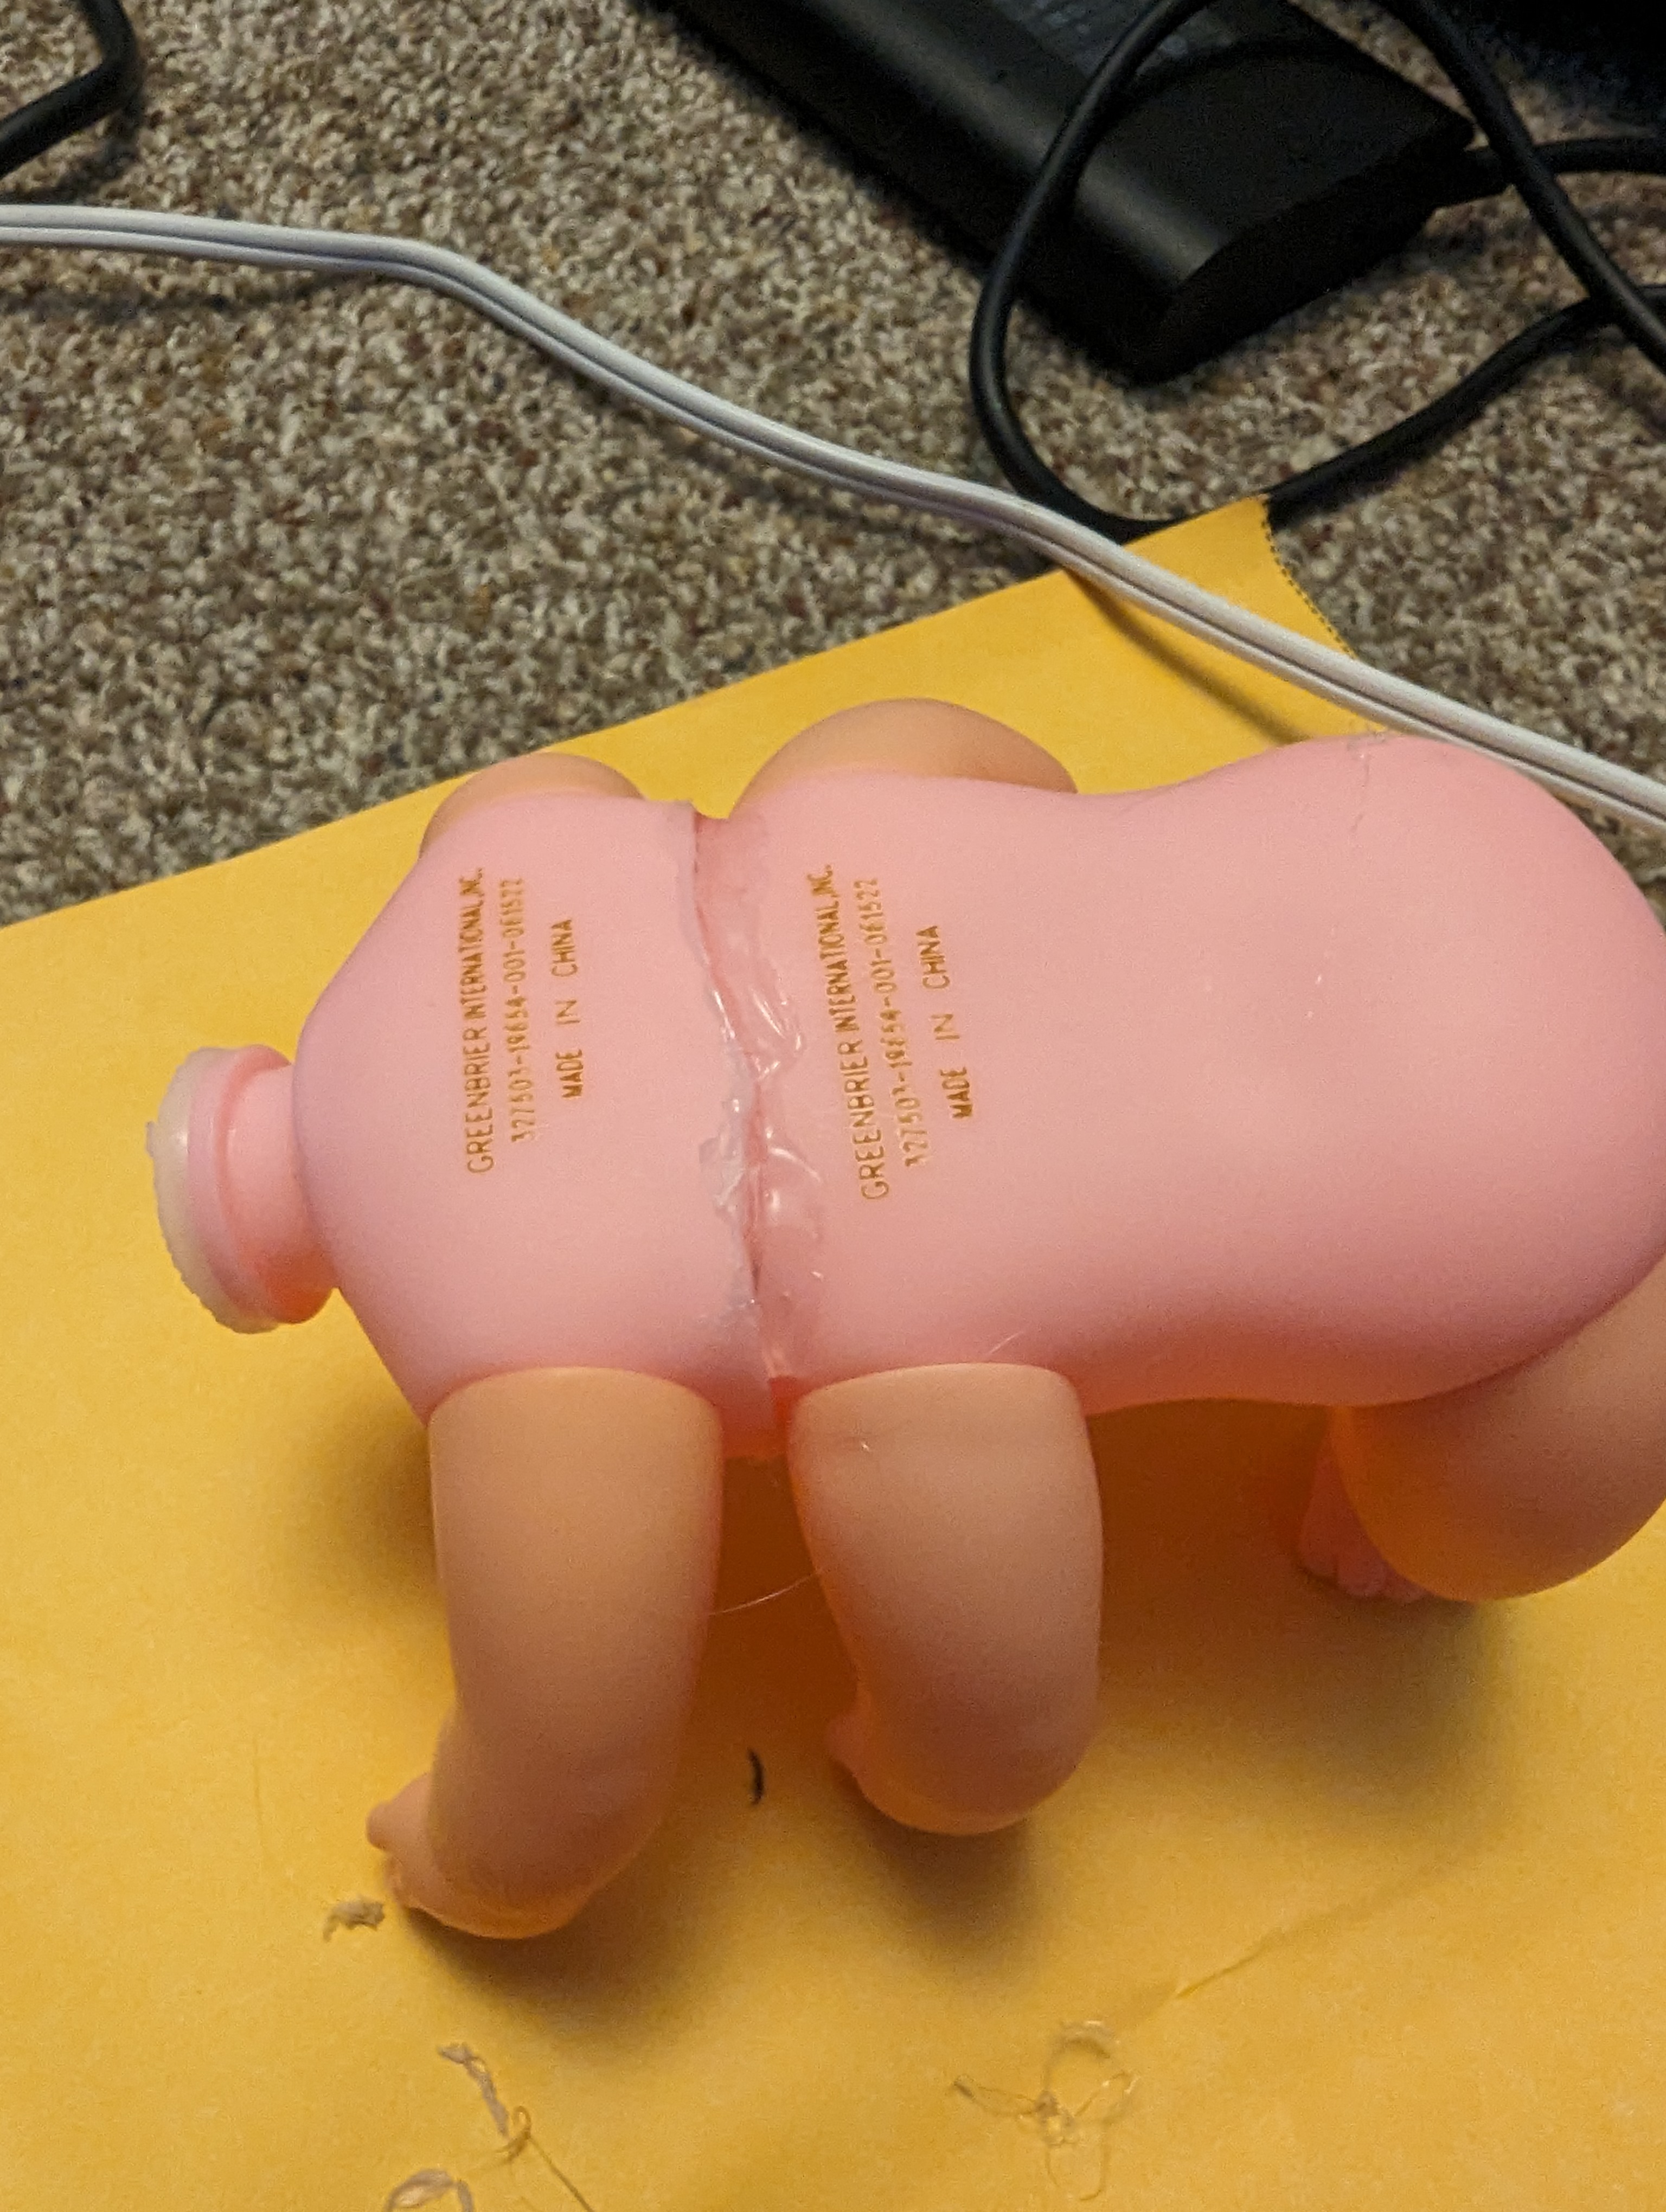
Lining up the pieces. What I hadn't anticipated was the size difference between where I had cut the segments and where I would be attaching them to the next doll. The cut under the armpit was quite a lot wider than the shoulder surface of the doll, and I didn't want to lose the mobility in the arms, so getting the pieces lined up right was challenging. No matter how I did it there would be a gap on one side or the other, and the hot glue was not holding the pieces together very well for some reason (probably because I was too impatient to wait for it to dry haha). I did the best I could, and I used the hot glue to fill in the gaps- since the doll is meant to look like an insect, having visible/elevated lines of glue between each body segment actually works to your favor.
Eventually I accepted the fact that the hot glue wasn't working and broke out the big guns: Elmer's glue haha. I covered the entire area I had used hot glue on with the Elmer's glue as a kind of reinforcement I guess. And then I waited. And waited... and waited. I seem to remember Elmer's glue drying pretty quickly when I used it in the past, but apparently they changed the formula to dry in 5-10 business years. I'm not kidding, this took hours. But when it finally did dry, it was actually pretty sturdy and the pieces stopped falling apart, so mission accomplished.
"No colors anymore, I want them to turn black..."
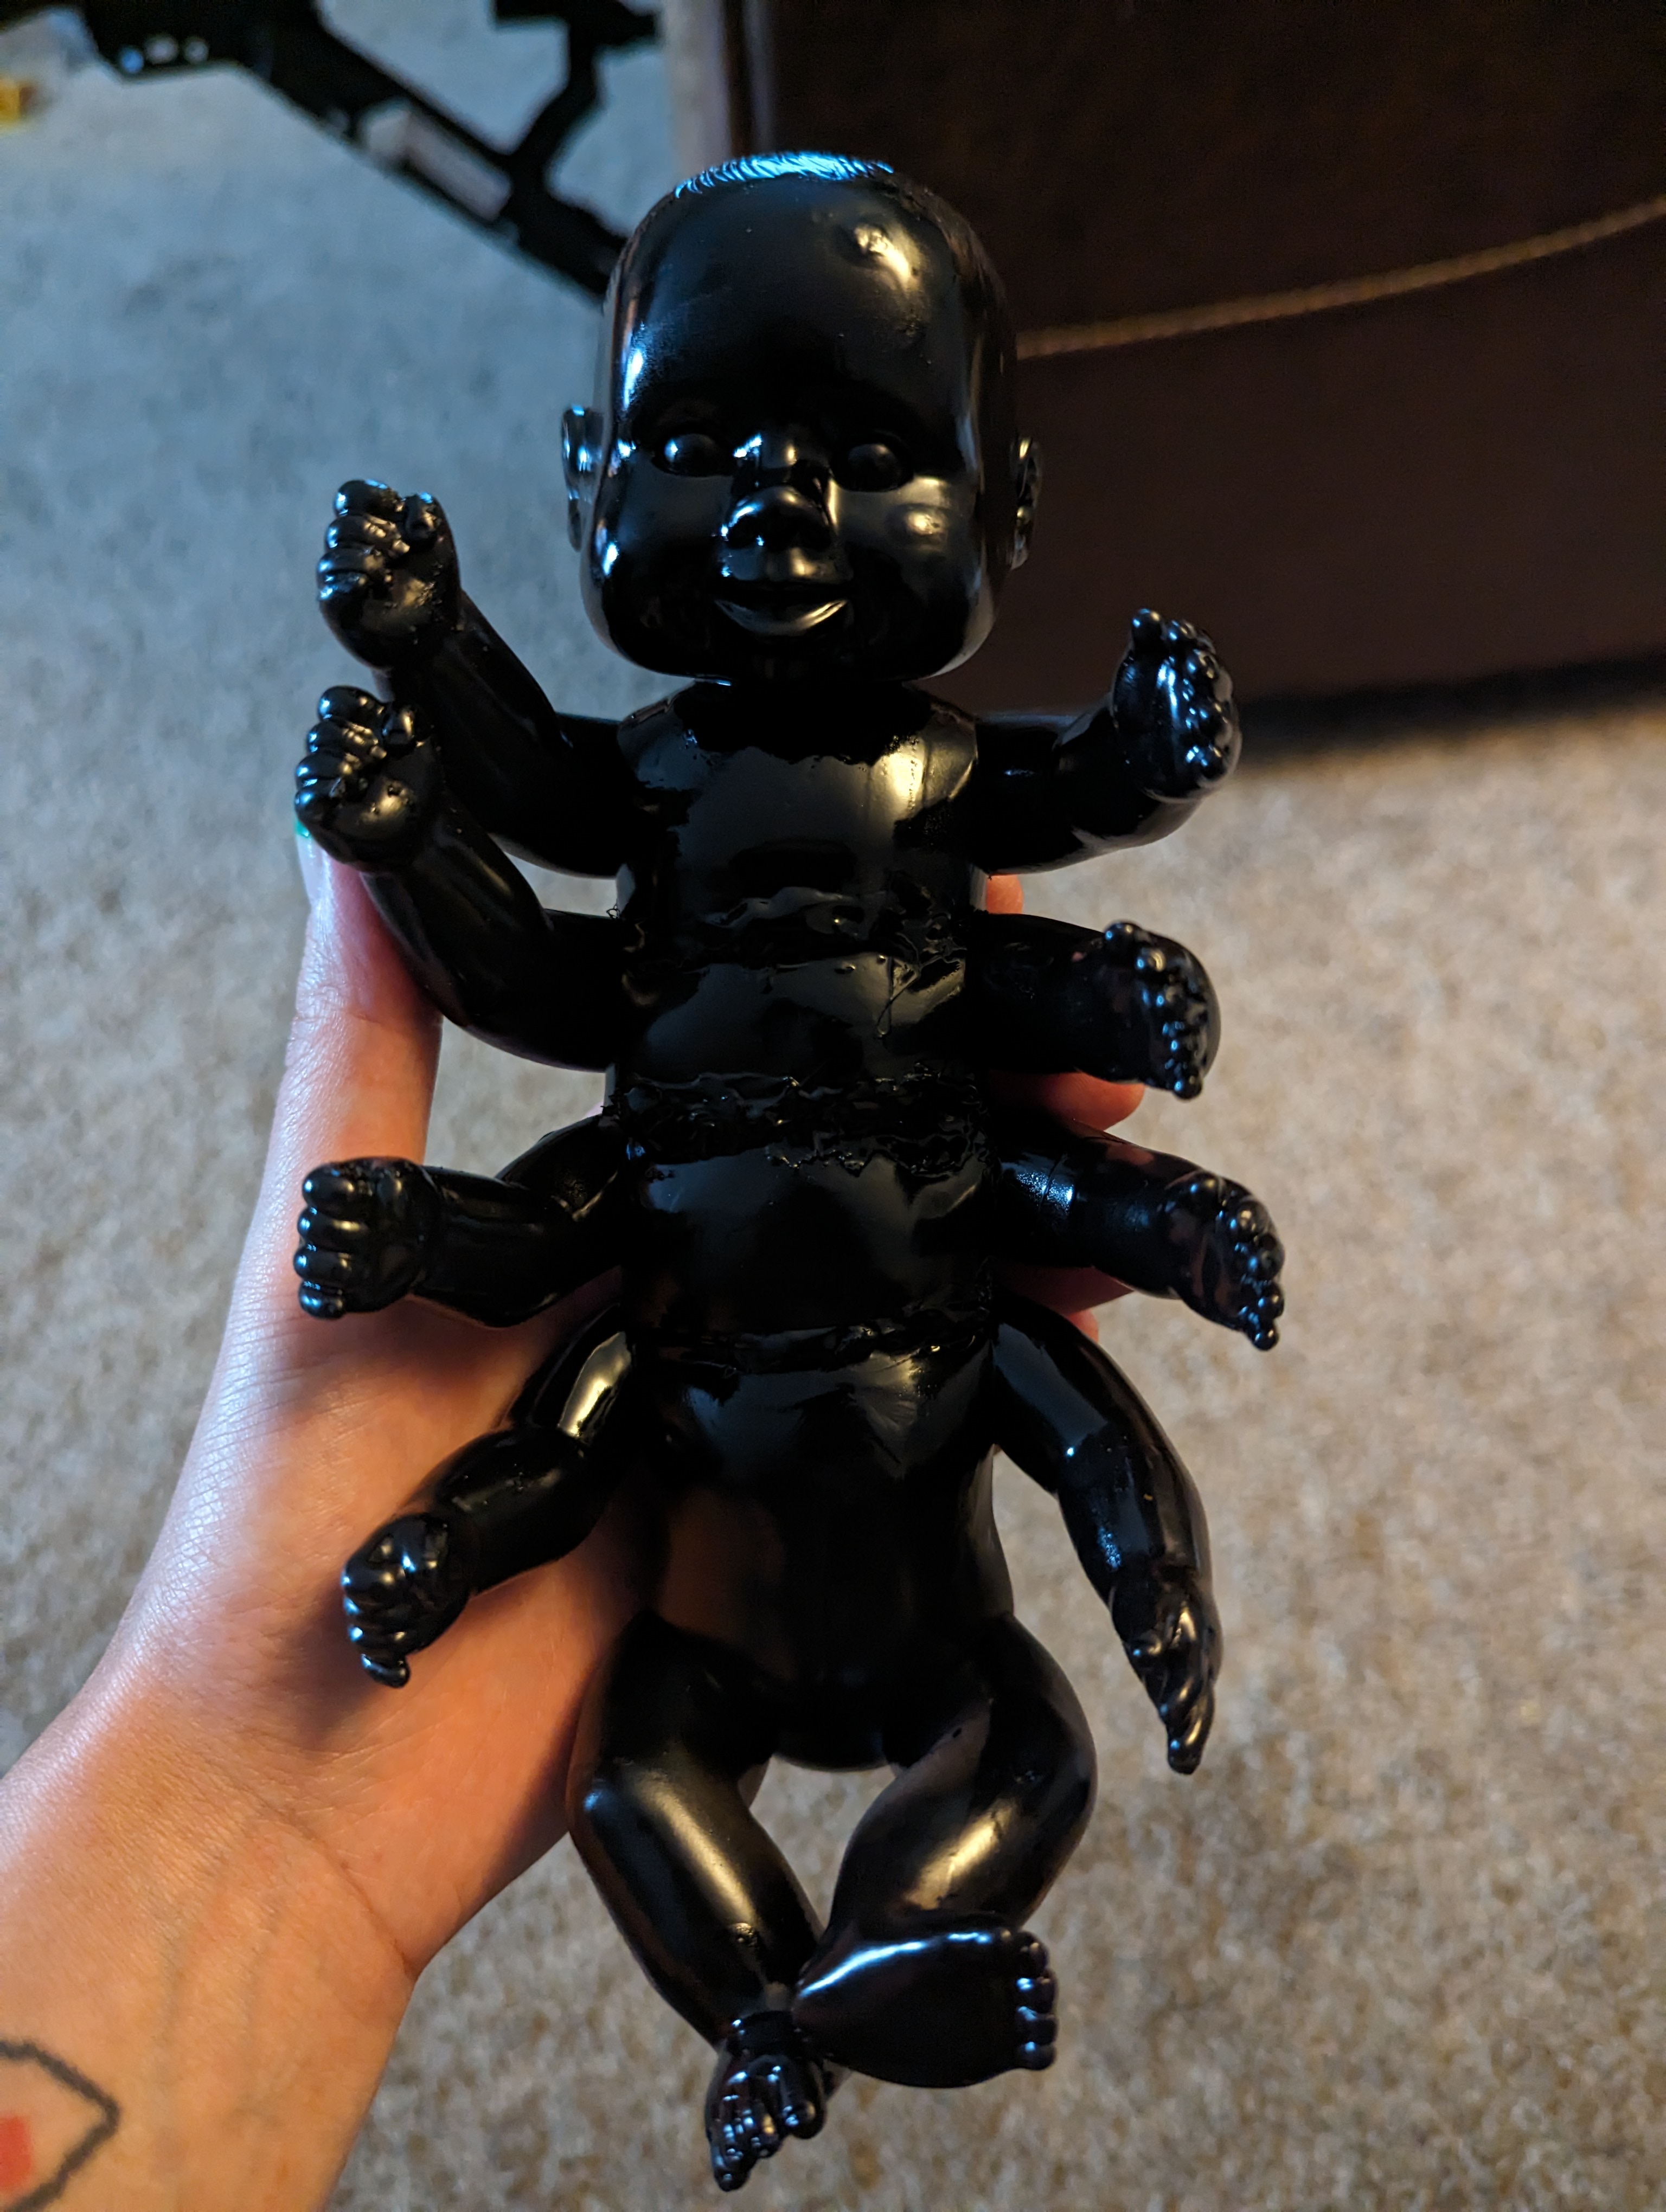
This step is pretty self-explanatory, no? Just paint it black. The only thing not pictured here is actually the next step: After the black paint dries, I applied two coats of "crackle medium". I forget the brand, but I got it at Michael's. It's a clear, sticky substance, and you have to let it dry for (allegedly) one hour but again it took forever. I decided to use two coats to make sure I got the effect I wanted because cutting and gluing the dolls was a pain in the butt and I didn't want to have to start over if I messed it up. After the crackle medium dries, you can apply your top coat of paint.
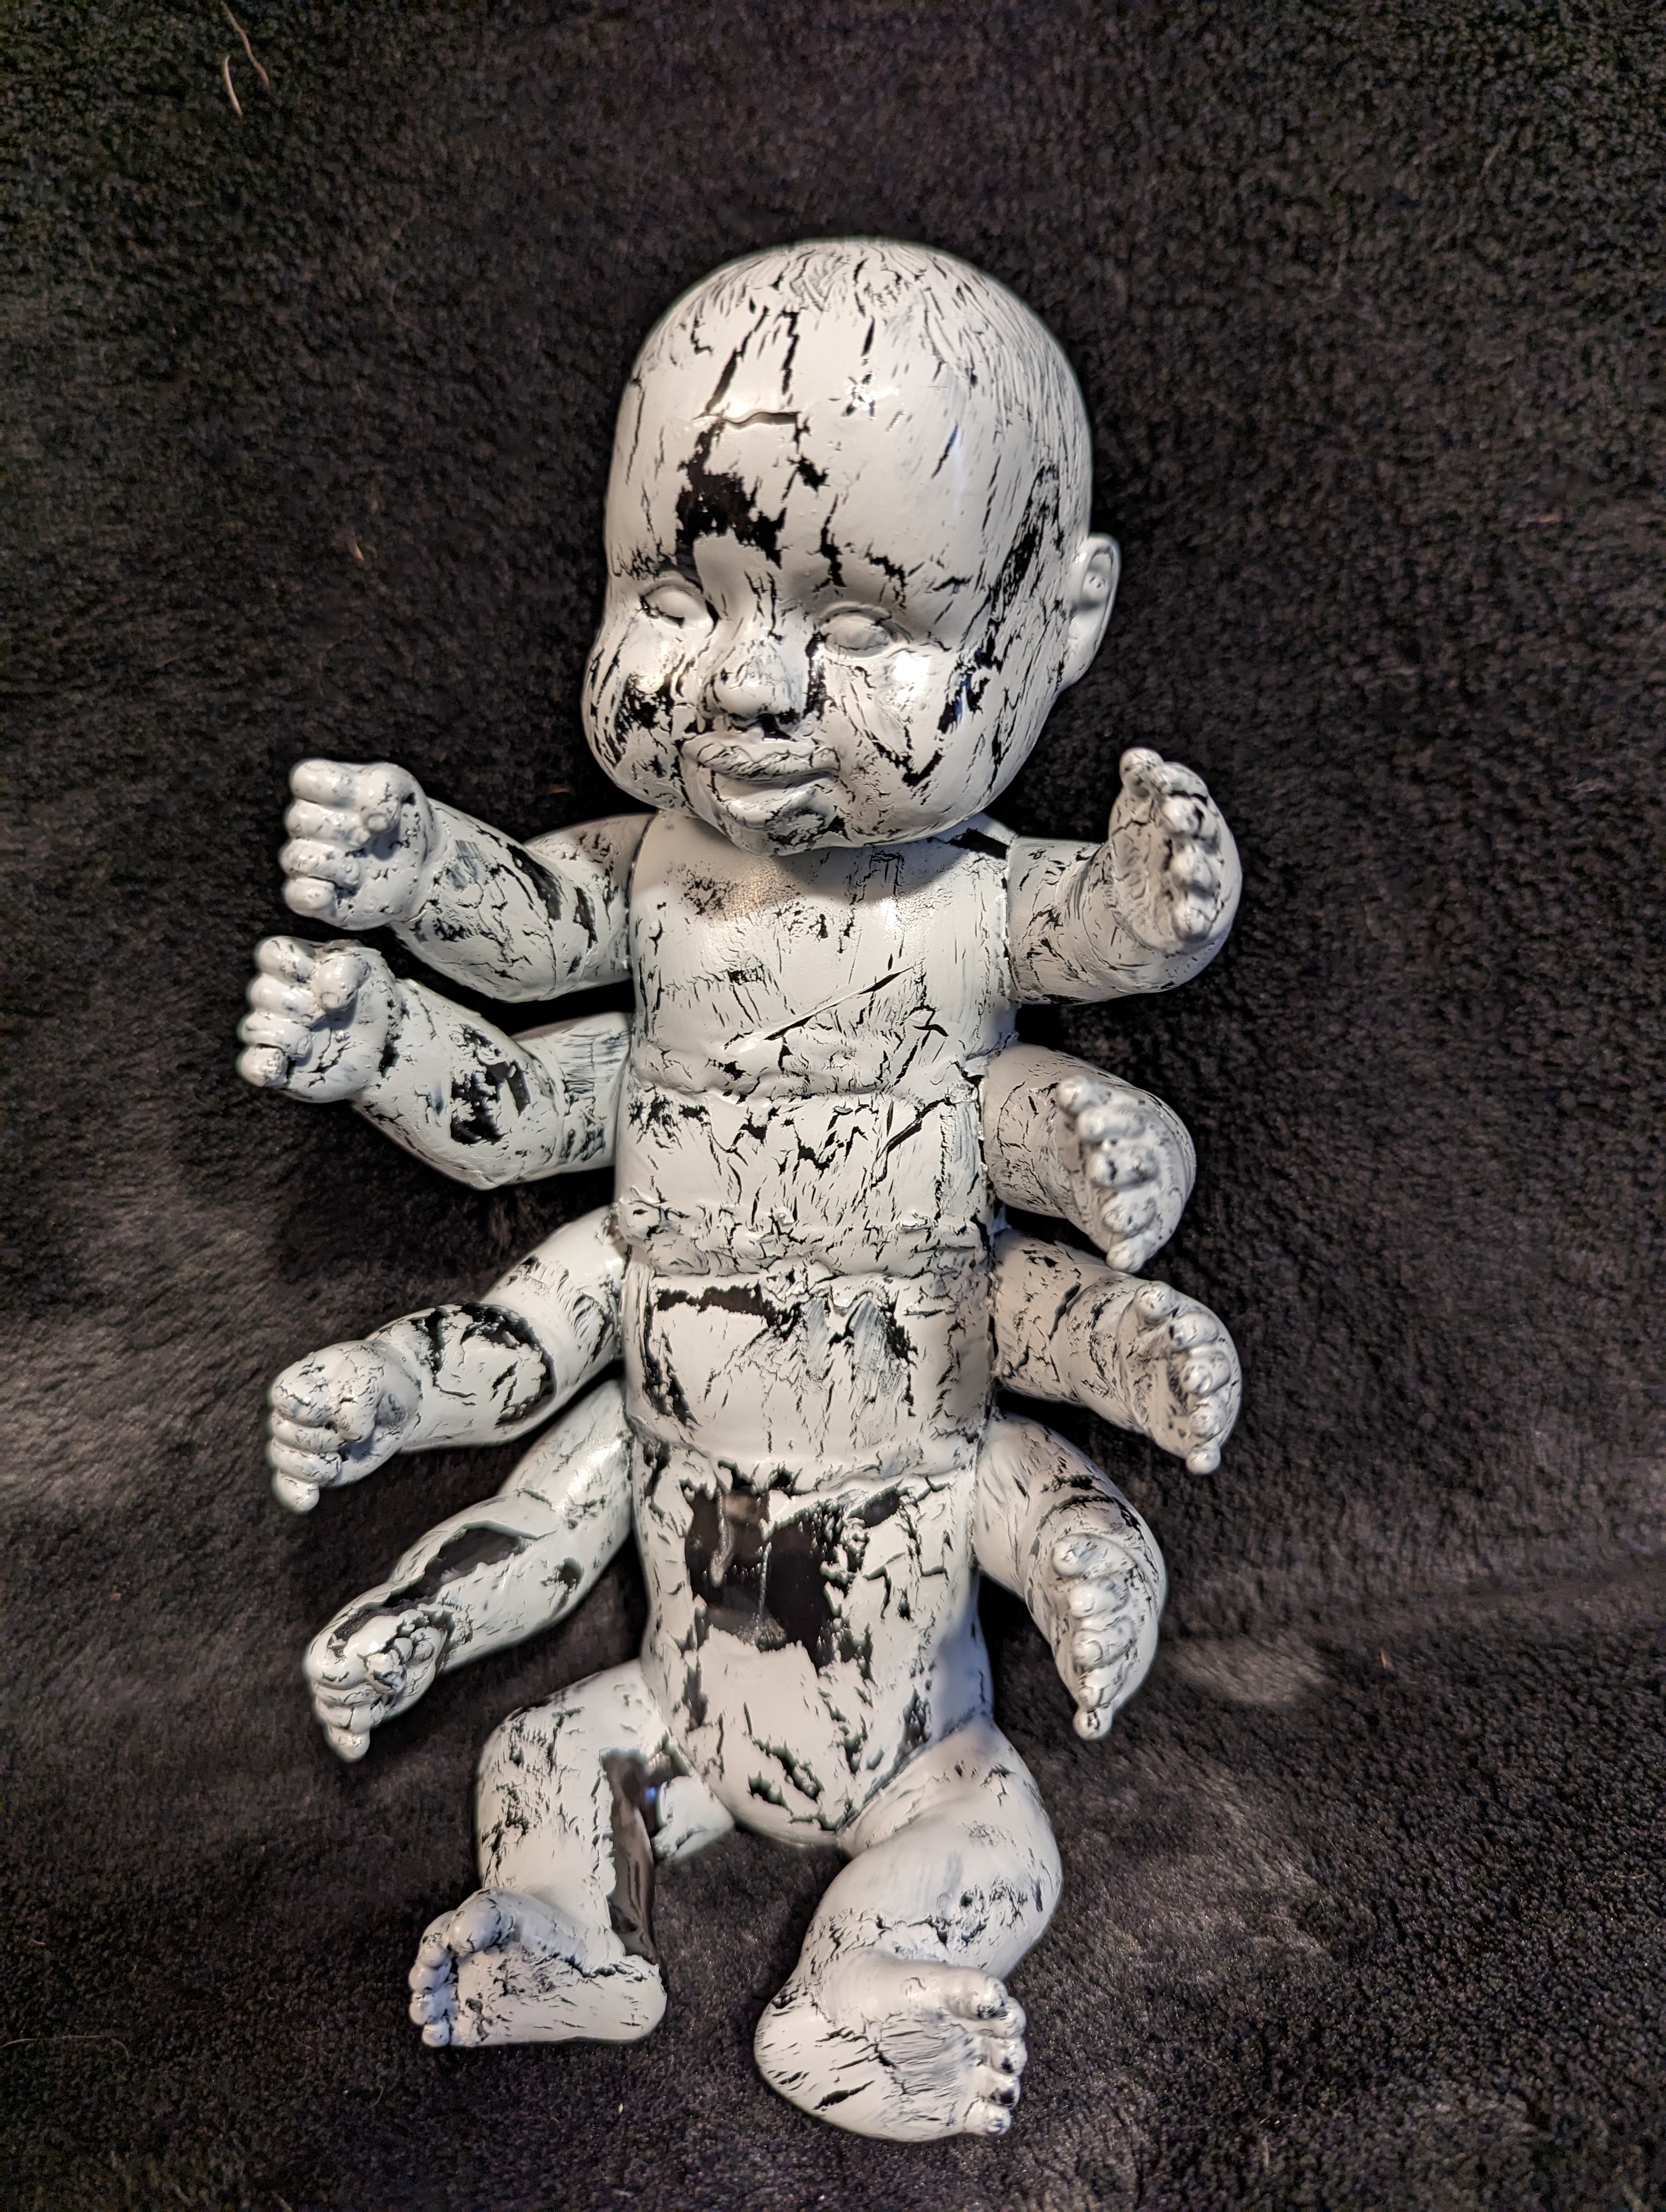
And this is what happens after the top coat of paint is applied! The crackle medium causes it to, well, crackle, and you are left with a distressed looking finish to your paint. You can seal it at this point if you want, but I chose not to. Mostly because I was burnt out on this project already, but also because the dolls are for decoration purposes only so they shouldn't be coming in contact with water or being manhandled in such a way that they would need to be sealed. But either way, there you have it! A completed Babypede to make your friends and family question whether or not it's time for an intervention!
Horror Babies!
8/4/23
I get a lot of questions about the horror movie baby dolls and how they were made. Fortunately, they are one of the few crafts I took pictures of in stages, so let's take a look at how to make them! We start with this little fella, found at the Dollar Tree for $1.25 when they are in stock (they always sell out around Halloween, but I'm sure that's just a coincidence...) You can order them on Dollar Tree's website as well, but they only sell them in cases, which isn't super convenient unless you plan to make a lot of them. Obviously, any baby doll will do, but why spend more if you don't have to? In this picture you can also see the package of Crayola air-dry clay and Granite Gray Apple Barrel paint that we will be using later.
Here I have some of Pinhead's chest markings sketched on the doll's chest and abdomen with pencil. Try to sketch lightly, but don't worry too much, they'll be covered by the paint. If you aren't familiar with Pinhead and the Hellraiser movies, I'm going to need you to pause right here and go watch them. Most of them aren't very good, but you cant help but love the Cenobites!
Bouncing around a bit because I like to work on 2-3 of them at a time, here we're getting started on Regan from the Exorcist. Which, unlike most of the Hellraiser movies, was actually excellent. I didn't have a shade of paint that I liked for her skin color, so using a reference picture from Google I mixed and matched a few colors I had on hand to get it just right. You can see the tan and white paints in the background, but I think there's some yellow in there, too. If you're wondering, the brand of paint doesn't seem to make a huge difference and I did not scuff up the surface of the doll to get it to stick. These dolls are for decoration purposes only, so as long as they are not being handled a lot or squeezed the paint stays on fine. At least it has so far!
Here is what Regan's dress looked like before I added the sleeves. Let me tell you, I'm no seamstress. I cut a rectangle out of the blue fabric I found at Walmart (a pre-cut square that was about $2 if I remember correctly) and made sure that it was long enough to wrap around the doll. Then I cut a notch around the neckline in the front, and held the doll with its arms outstretched over the fabric to mark where the hands touched the material. I cut two circles out where the hands touched, and gradually made them bigger little by little while trying it on the doll until it fit the way I wanted it to. Are there easier ways of doing this? Probably. Do I know what they are? Nope!
Next I made two tubes of the same blue fabric that were wide enough for the arms but a little longer than necessary- I made them longer so I could cut four little slits on one end of each tube, fold them over like tabs, and hot glue those tabs to the body of the dress without the sleeves being too short after. After adding the sleeves, I tried the dress on the doll, and it fit! Sweet. Next, I cut a small strip of white ribbon (also from Walmart) to decorate the upper part of the dress, but I still thought it looked pretty plain and I couldn't place why. But I had an idea! My grandmother had given me her old sewing kit a long time ago, and like I said I'm no seamstress so it hasn't been opened in a very long time, but I remembered that she had saved a lot of scraps from projects she had been working on. I went and checked it out, and wouldn't you know she had a strip of lace in there that just happened to match everything else on Regan's dress? Thanks for the assist, gram! Sewing lace is tough because there isn't much material for the thread to catch, but after some name calling and tears, we got there!
Taking a break from Regan for a bit, I went back to work on Pinhead. I used the Crayola air dry clay you saw earlier to wrap around the doll's head, and until now I had never used it before so I didn't know what to expect. The clay was very light and airy- I assumed it wouldn't hold up and would likely disintegrate not long after it dried, but (spoiler alert!) so far it's held up better than I expected. I used a stretch of fishing line to make the indents of the grid-pattern in the clay to try and keep the lines sharp and evenly spaced, but then I had to wait 24hrs for the clay to dry before I could do anything else with him. This picture was taken the day after, as you can see I did a trial run of the paint I used for his skin color. Just like Regan, I didn't have the color I needed so I made a custom color. This one was white, blue, and I believe a very small touch of black to get that blue-gray tinge.
Coming back to Regan, I again used the iconic picture of her I had found on the interwebs as inspiration for the cuts and bruises on her face. I layered the colors with the darkest ones (blue, purple) first and then the lighter ones (red, tan) on top. Painting the eyeballs is a pain in the nether regions because it takes a very fine brush (which I don't have) and steady hands (also, somehow missing) to get the paint where you want it and not on her forehead. With most of the other dolls I tried to only paint the iris, leaving the pupil and whites of the eyes exposed as it seemed to give the eyes more life. Looking at the eyes of the original doll before I began painting it, you wouldn't think that there is a lot of subtle color in the whites of the eyes, but I didn't paint Captain Spaulding's eyes at all and he looks high as a kite because of it haha. Oh well.
Pinhead is painted! It's tricky to paint straight lines around the wrists, ankles, and the cut-outs on the chest, but with a little patience we got there. I used the same skin tone I made for his hands to cover the head/clay, and when that was dry I used a dark red to go over the lines I had made with the fishing line. The clay still felt really spongey and weird so my concerns for how it would turn out were mounting, but in hindsight it was perfect because not only did it hold up, but the light weight of the clay didn't make him top-heavy.
Regan is complete! Now you're probably wondering, "but how did you do her hair?!" Well, let me tell you what I did so you know what not to do if you try making these yourself haha. While I was at the Dollar Tree (in preparation of making these dolls), I also bought two brown haired Barbies. I cut all of their hair off (throwback to my childhood!) and attempted to hot-glue it onto Regan. The hot gluing worked perfectly, but the way I imagined hair working absolutely did not. I thought I would work in layers starting on the back of her head and working forward, but then I realized that Regan had bangs in the movie and what I was doing would not have worked in the front. So then I tried making bangs in the front, but this left the top of her head between the forehead and the back of her neck mostly bald. I started to get impatient at this point, and just started grabbing clumps of hair and gluing them willy-nilly all over the place, which ended up working out great when the goal is to make a doll look possessed, but unfortunately it doesn't stick to her head with magic, so she now has a giant strap of hot glue running from ear-to-ear across the top of her head. This is the primary reason that Reagan is not for sale- She looks cute in the pictures, but in real life she is a soup sandwich. But she's my soup sandwich and I love her, so that's all that matters!
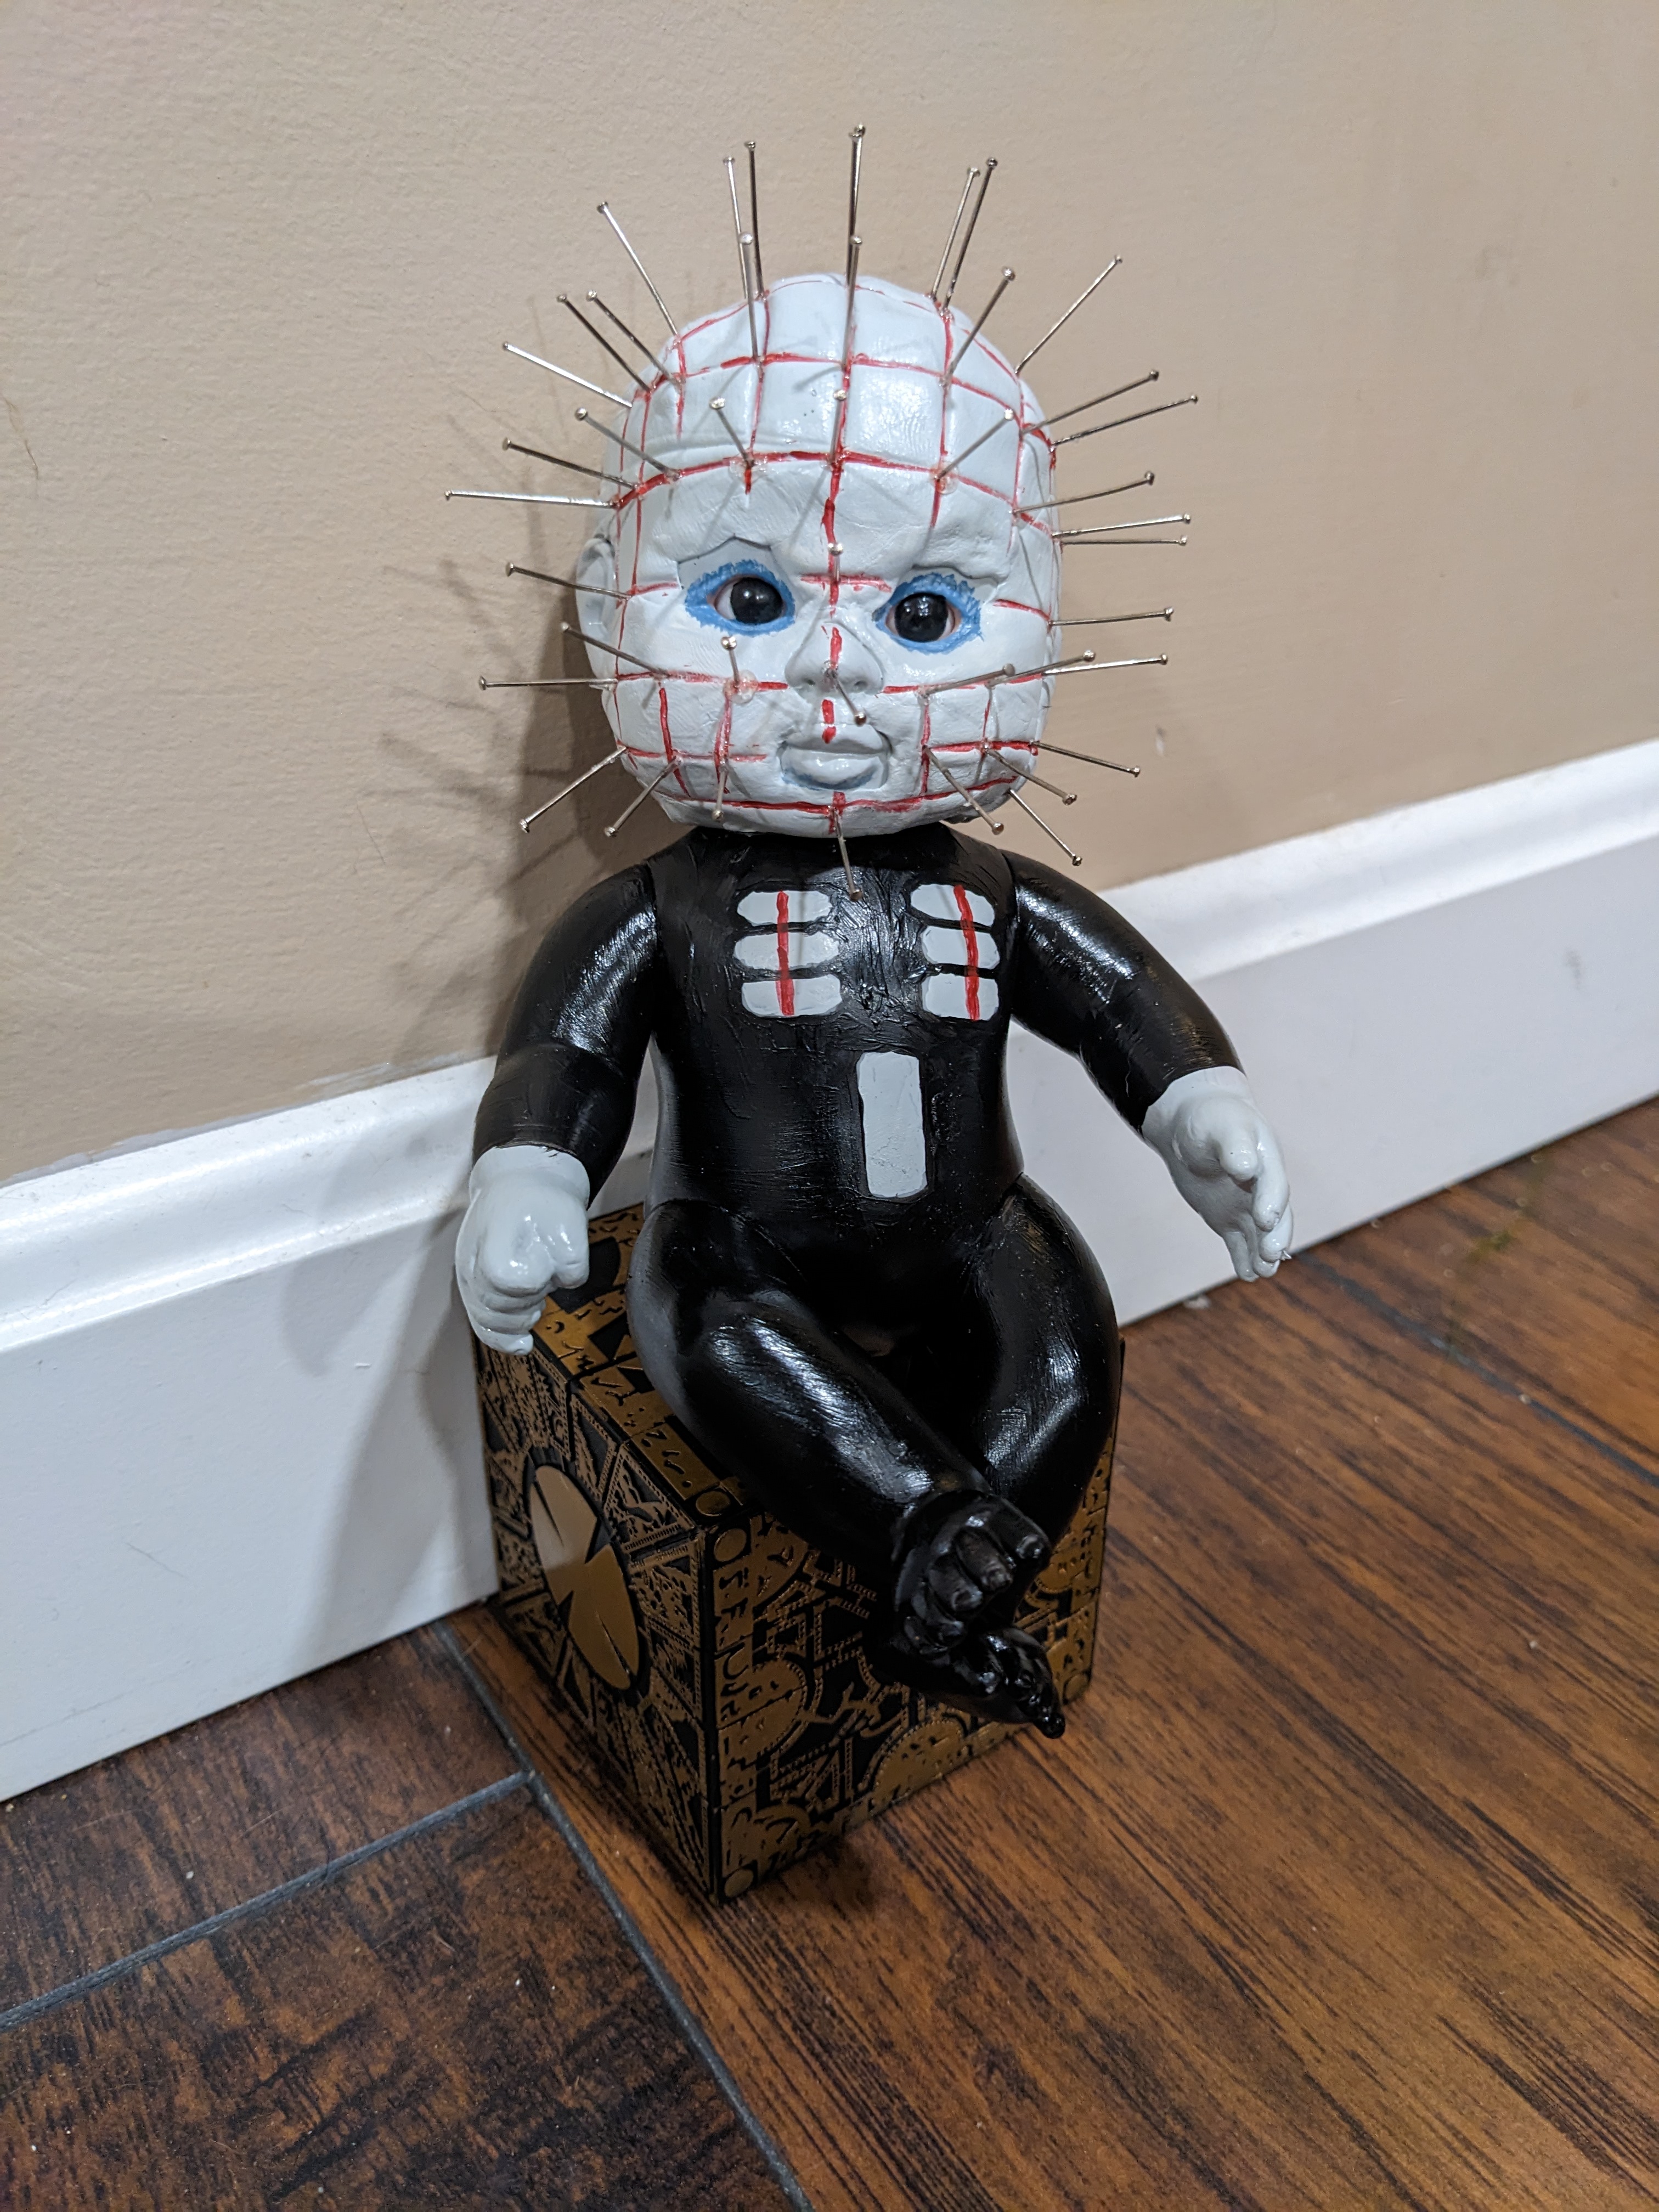
Last but not least, Pinhead in all his glory! Now, a smart person would have inserted the pins BEFORE the clay was dry, but I thought it would be fun to wait until after it hardened because a thumb is a stupid place to have skin anyway. I was worried about ruining all the clay, which was still spongey and malleable at this point, but surprisingly that stuff can take a beating. I dipped the tip of each pin in E6000 glue before forcing it into place (and when I say 'force', I mean I had to throw several pins out because they buckled under the pressure while I was trying to get them in there...). I decided to leave the back of his head pin-free- Partially because I didn't want him getting snagged on everything, and mostly because I couldn't feel my thumb anymore. Seriously. It was completely numb, and it took almost a week for the feeling to come back. Now, he can sit up against the wall without causing damage, and that's more important anyway, in my opinion. If you're wondering about the Hellraiser puzzle box he's sitting on, I got that on Temu for $13, ironically about a month before I had even considered making the dolls. Funny how things work out that way, huh?
The Cosmic Puzzle
The final threshold crossed
Devourer of galaxies
The cessation of time
As night swallows the day
Collapsing space and matter
To a finite point
Unstable, chaotic
All that has come to pass
And will again become
Every miracle, each atrocity
Every mountain and every king
Once more returned to their iterating cradle
Entangled photons
Bathed in the color of time
Dancing on the precipice of existence
An ancient longing fulfilled
A single moment of familiarity
Divided by eons
A forbidden spark ignites
Shattering the mercurial balance
Triggering a magnificent, colossal explosion
Hurtling forward through the icy darkness
A breathless sigh into the cavernous unknown
To begin again
The slate washed clean once more
Another chance against incalculable odds
To find the missing piece amongst the stars
May, 2023
Forever 28
It's a great honor to stay
in such a beautiful place,
surrounded by heroes
who all wear the same face.
Colorful flowers,
peaceful, stoic trees,
a long granite walkway
lined with memories.
Music like clockwork,
everyday about noon,
to honor the fallen—
taken too soon.
A spot on the corner
with a sobering view
is all that remains
of the man that was you.
Questions without answers,
tears pour like rain,
years passed in minutes
but the heartache remains.
Some say it gets easier
in time, all things mend—
but they never sat graveside
of a lover, and friend.
The sound of your laughter
burned into my soul,
a piece of me died with you
and I will never be whole.
I sit here now, I'm 30
as I think about your fate
I'm older now than you'll ever be—
Forever 28.
Things I wish I could've said
but it's time I didn't take,
it's too late for “I'm sorry”
to fill the absence in your wake.
Rain slaps the ground lazily,
there's nothing left for me to do,
so I sit there by your headstone
and I talk to you.
You slipped away so peacefully
without a whisper or a shout
an angel gained his wings that day,
but a light on Earth flickered out.
April, 2018
Black Coffee
A chance encounter,
be it by destiny or design.
Evocative thoughts and honest musings
resonate between esoteric souls,
losing themselves to find each other.
A leap of faith into a hopeful future
full of wonder and promise.
Love emerging from the chrysalis,
faltering like a calf's first clumsy steps
into a squalid city that never sleeps.
The scent of wet asphalt in the summer heat,
two kids playing in the moonlight,
taking the world in through new eyes,
finding adventures in the mundane.
A heartbeat soft as sunlight beneath the palm,
lying beneath a blanket of stars
in the bowels of an urban jungle.
Clinging to every twilight moment,
prolonging the night in desperation
as if each one would be the last.
Restless with anticipation
of the dreaded break of dawn,
the waking world moving faster,
life passing by before you realize
how young you were
when you foolishly thought you were old.
The smoldering embers of nostalgia,
a snapshot of youth fading into obscurity,
memories eroding beneath the weight of age
like echoes lost in the chamber of time.
Returning now to that sacred place,
the ghosts of a memory long past
whispering softly in the summer breeze,
frozen in time, delicately enshrined.
A wish fulfilled for an endless night.

